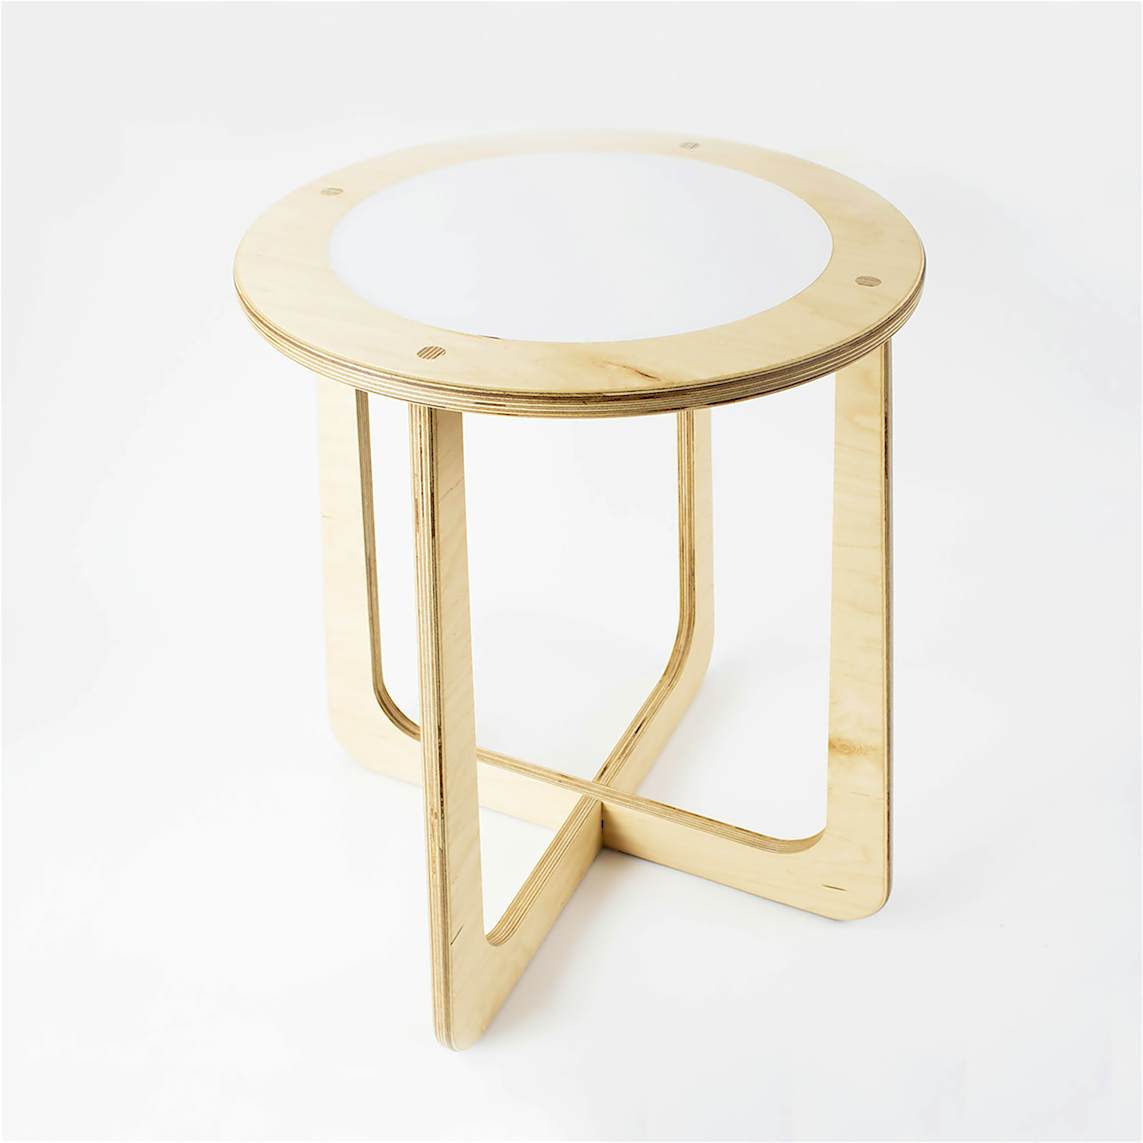
Inlay Table
By Shaper|BY-NC-SA 4.0 License|Created January 30th, 2018


2 hr
Advanced
39
Prepare your work table
Want a preview of the process? Check out this video of Shawn making his version of the Inlay Table
Note: This project contains instructions for an optional inlay feature for the top surface. If you do not wish to include the inlay feature, just skip the steps that say “optional”.
Set up your spoilboard on top of your work table.
Start with the plywood for the table top, using a sheet that is at least 20 in. x 32 in.
In the area you will be cutting, apply three pieces of double-sided tape to the back of your material. Remove backing from the tape and stick down to your spoilboard. Clamp the material and spoilboard together securely to the work table.
Setup your workspace in Origin
Apply ShaperTape to your material in the area that the camera will be tracking while cutting. For this design, we recommend at least 20 in. x 28 in. of taped work surface all over your cut area.
Scan your work surface and Place the design file in the workspace along the bottom long edge of your plywood.
Once placed, test your placement by hovering over the edges of your design with the tool to make sure you will be able to complete all cuts without running into clamps, edges, or losing view of ShaperTape.
Install ¼” Up-Cut Bit
Install the ¼” Up-Cut Bit.
On screen, update the following:
Bit size: ¼” (0.25 in.)Z touch to calibrate the new bit height to your workspace
[Optional] Rough Inside cut for the inlay pocket
Note: The next four steps will take you through making the pocket for the acrylic inlay. If you do not want an inlay in your table, you can skip these steps.
The depth of this pocket is determined by the thickness of your inlay material. Measure your inlay material with calipers prior to cutting. In this case, our material is 0.13 in. acrylic
Since this is going to be a very large pocketed area, start by making two rough Inside Cut passes around the inlay circle. This will give you a more of a buffer zone for when you pocket out the rest of the material.
Hover over the edge of the pocket and update/confirm the below settings to make your cuts.
Pass #1Depth: 0.13 in.Cut type: InsideOffset: 0.02 in.Bit size: ¼” (0.25 in.) Spindle speed (off screen): 5
Pass #2:Offset: ¼” (0.25 in.)
[Optional] Finish cut for the inlay area
In order to clean up the edges, make an Inside cut finish pass around the inlay circle.
Hover over the edge of the inlay circle and use the following settings to make your finish cut:
Depth: 0.13 in. Cut type: Inside Offset: 0 in. Bit size: ¼” (0.25 in.) Spindle speed (off screen): 5
[Optional] Change bit to 1” end mill
It is possible to pocket out the inlay area with a ¼” Up-cut bit. However, it will take some time given the large area. To cut down on that time, we used a 1" end mill bit with a ¼” shank to remove material faster.
Install the 1” End Mill bit.
On screen, update the following:
Bit size: 1.0 in.Z touch to calibrate the new bit height to your workspace
[Optional] Pocket out the inlay area
On tool, change the inner circle cut setting to a pocket cut.
Hover over the edge of the inlay circle and use the following settings for this cut:
Depth: 0.13 in.Cut type: PocketOffset: 0 in.Bit size: 1” or ¼” (0.25 in.) Spindle speed (off screen): 5
Important note: Because the pocket is larger than the base of the tool, you must cut stratigically so that your tool does not fall into your pocket. In order to do this, start at the bottom of the of the pocket closest to you, cutting from left to right as you move from the bottom to the top of your pocket. This approach allows the front, heavier part of the tool to always have a surface to rest on as you make your cuts.
As always with pocketing, maintain consistent downward pressure on the tool while cutting.
Install ¼” Up-Cut Bit
Now we will go back to using the ¼” Up-Cut Bit.
Install the ¼” Up-Cut Bit.
On screen, update the following:
Bit size: ¼” (0.25 in.)Z touch to calibrate the new bit height to your workspace
Cut out the table top & four mortise holes with three rough passes
Make your first rough pass around the table top & (four) mortise holes and then increase the depth on two subsequent rough passes.
Hover over the edge of the contours and use the below settings to make your cuts.
Pass #1:Depth: ¼” (0.25 in.)Cut type: Outside for exterior table top contour/Inside for mortise holesOffset: 0.02 in.Bit size: ¼” (0.25 in.) Spindle speed (off screen): 5
Pass #2:Depth: ½” (0.5 in.)
Pass #3:Depth: ¾” (0.75 in.)
Finish cut the table top
In order to clean up the edges, make a finish pass for the table top cuts.
Note: Don’t forget the four mortise holes for the legs to fit into later.
Hover over the edge of the table top and use the below settings and make your cuts.
Depth: ¾” (0.75 in.)Cut type: Outside for exterior table top contour/Inside for mortise holesOffset: 0 in.Bit size: ¼” (0.25 in.) Spindle speed (off screen): 5
[Optional] Prepare your work table for cutting the inlay material
If you are not doing an inlay, you can skip this step.
Now we are moving on to the ⅛” thick acrylic for the top of the table. For this portion, your material should be at least 14 in. x 25 in.
In the area you will be cutting, apply two or three pieces of double-sided tape on the back of your material. Remove backing from the tape and stick down to your spoilboard.
Clamp the material and spoilboard together securely to the work table.
[Optional] Setup your acrylic workspace in Origin
Apply ShaperTape to your material in the area that the camera will be tracking while cutting. For this design, we recommend at least 20 in. x 28 in. of taped work surface all over your cut area.
Scan your work surface and Place the design file in the workspace along the bottom long edge of your acrylic.
You will be using the same file you used for the table top, cutting the the inlay circle with an Outside cut to fit into the plywood pocket.
Once placed, test your placement by hovering over the edges of your design with the tool to make sure you will be able to complete all cuts without running into clamps, edges, or losing the view of the ShaperTape.
[Optional] Install ¼” 0-Flute Spiral bit for plastics
It is possible to cut acrylic with the ¼” Up-Cut bit provided with Origin. However, for the best results in cut quality on acrylic, a ¼” 0-Flute bit is recommended.
Install the ¼” 0-flute spiral Bit.
On screen, update the following:
Bit size: ¼” (0.25 in.) Z touch to calibrate the new bit height to your workspace
[Optional] Rough pass on acrylic top
Make a rough pass around the outside of the acrylic inlay circle.
Note: When cutting plastics, it is important to keep a consistent feed rate and a medium RPM on the spindle (we recommend 3 or 4). This is to avoid melting the material.
Hover over the edge of the circle contour and use the below settings to make your rough cut.
Depth: ⅛” (0.125 in.)Cut type: OutsideOffset: 0.01 in. Bit size: ¼” (0.25 in.) Spindle speed (off screen): 3 or 4
[Optional] Finish cut on acrylic top
In order to clean up the edge and achieve the final dimension, you will make a finish pass around the outside contour of the circle.
Hover over the edge of the circle and use the following settings to make your final outside cut:
Depth: ⅛” (0.125 in.)Cut type: OutsideOffset: 0 in.Bit size: ¼” (0.25 in.) Spindle speed (off screen): 4
Before removing the acrylic circle piece, flip the plywood top over onto the acrylic to make sure the inlay will be a snug fit. If not, you can make micro adjustments using the Offsets to achieve a snug fit.
Prepare your work table for cutting the table legs
Now you will be moving on to the legs of the table. After cutting out the profile of the legs, you will need the Vertical Workstation to complete the tenons that fit into the table top.
To cut the legs of the table, your material should be at least 24 in. x 42 in.
In order to avoid using a ton of unnecessary double sided tape, we recommend that you map out where the legs are going to be placed on your material. Once you’ve done that, make sure there is plenty of tape directly under your cuts. Remove backing from the tape and stick down to your spoilboard.
Clamp the material and spoilboard together securely to the work table.
Setup your workspace in Origin
Scan your work surface and Place the design file in the workspace along the bottom long edge of your plywood.
Once placed, test your placement by hovering over the edges of your design with the tool to make sure you will be able to complete all cuts without running into clamps, edges, or losing the view of the ShaperTape.
Install ¼” Up-Cut Bit
Install the ¼” Up-Cut Bit.
On screen, update the following:
Bit size: ¼” (0.25 in.)Z touch to calibrate the new bit height to your workspace
Rough cut the table legs
Make your first rough pass around the table legs and then increase the depth on two subsequent rough passes. Don’t forget the Inside cut for the notch on the bottom of each leg!
Hover over the edge of the leg contour and use the below settings and make your cuts.
Pass #1:Depth: ¼” (0.25 in.)Cut type: Outside for table legs/Inside for notchesOffset: 0.03 in.Bit size: ¼” (0.25 in.) Spindle speed (off screen): 5
Pass #2:Depth: ½” (0.5 in.)
Pass #3:Depth: ¾” (0.75 in.)
Finish cut the table legs
In order to clean up the edges, make a finish pass around the legs.
Hover over the edge of a leg and use the following settings to make your finish cut:
Depth: ¾” (0.75 in.)Cut type: Outside for table legs/Inside for notchesOffset: 0Bit size: ¼” (0.25 in.) Spindle speed (off screen): 5
Setup your Vertical Workstation for the leg tenons
In order to create the tenons for the legs you will need to set up the Vertical Workstation.
To make sure the two tops of each leg are in line with each other, we recommend using a piece of flat scrap wood clamped to the top of the vertical workstation. Make sure that the two points are pressed firmly against the top surface. The side of the leg should be against the alignment pins. Clamp firmly and then remove the scrap.
Scan your work surface making sure to go slowly and capture the area in the vertical workstation you will be cutting.
On screen, update the following:
Bit size: ¼” (0.25 in.)Z touch on top of the area you’ll be cutting to calibrate the new bit height to your workspace
Create a grid in your workspace
Switch to Design Mode and tap the grid button in the lower left-hand corner. Select a 1/8” grid from the menu and follow the on screen instructions to define the edges of the table leg (not the vertical workstation) and apply the grid.
Place the design for the tenon cut
In Design Mode, tap the “+” button in the top left hand corner of the screen to view your files.
When you go to place the design, you will see that there is a blue Guide line in the file. This line should align with actual edge of your material. To do this, the bottom left hand corner of the guide should snap to the bottom left hand corner of your table leg grid. When the alignment is correct, press the green button to place the file.
Rough cut tenon in three passes
In order to cut the tenons, you will start with an Outside Cut for the dimension of the tenon, then clean up the corners of the material that the Outside Cut missed with a Pocket Cut
Follow the below sequence to rough cut your tenon.
Pass #1:Depth: ¼” (0.25 in.)Cut type: Outside first / then PocketOffset: 0.02 in.Bit size: ¼” (0.25 in.) Spindle speed (off screen): 5
Pass #2:Depth: ½” (0.5 in.)
Pass #3:Depth: ¾” (0.75 in.)
Finish cut tenon
In order to clean up the edge, you will make a finish Outside Cut around the tenon.
Hover over the edge of the contour and use the following settings to make your finish cut:
Depth: ¾” (0.75 in.)Cut type: Outside Offset: 0 in.Bit size: ¼” (0.25 in.) Spindle speed (off screen): 5
Flip and cut other side of leg
Now that the tenon is at its final dimension, you can remove the leg from the Vertical Workstation and rotate it to cut the other side. Repeat steps 21-25.
When finished, repeat this sequence for the second table leg.
[Optional] Round-over edges
Using a ¼” Round-over bit on a router table, round edges as desired.
[Optional] Paint inside of inlay pocket
Because pocketing plywood can sometimes expose discolored areas, we chose to spray-paint the pocketed area white to show through the semi-transparent white acrylic for the inlay.
Sand all surfaces
Sand the table top and legs with 180 grit sandpaper.
Glue the legs
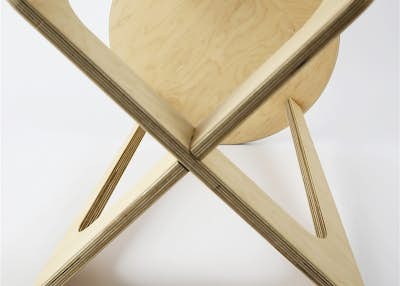
Apply wood glue to the inside of the notches where the legs intersect.
Connect the two legs.
Glue the tenons and connect the legs to the top
Apply wood glue to each of the four tenons at the top of the legs.
Align the four tenons with the four holes in the table top.
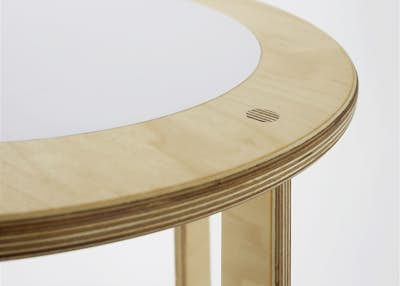
Using a rubber mallet, hammer the top down until it sits flush on the legs. The tenons should protrude slightly above the table top. These will be cut and sanded after the glue dries.
Final touches
Once the glue has dried, pair the tenons down using a chisel or hand plane and sand flush with 180 grit sandpaper.
Apply finish and let dry.
After the finish is dry, use a soft mallet to tap the acrylic inlay into the pocket (optional).
Congrats!
You’re all finished!
© ShaperHub & Shaper Tools, Inc. all rights reserved