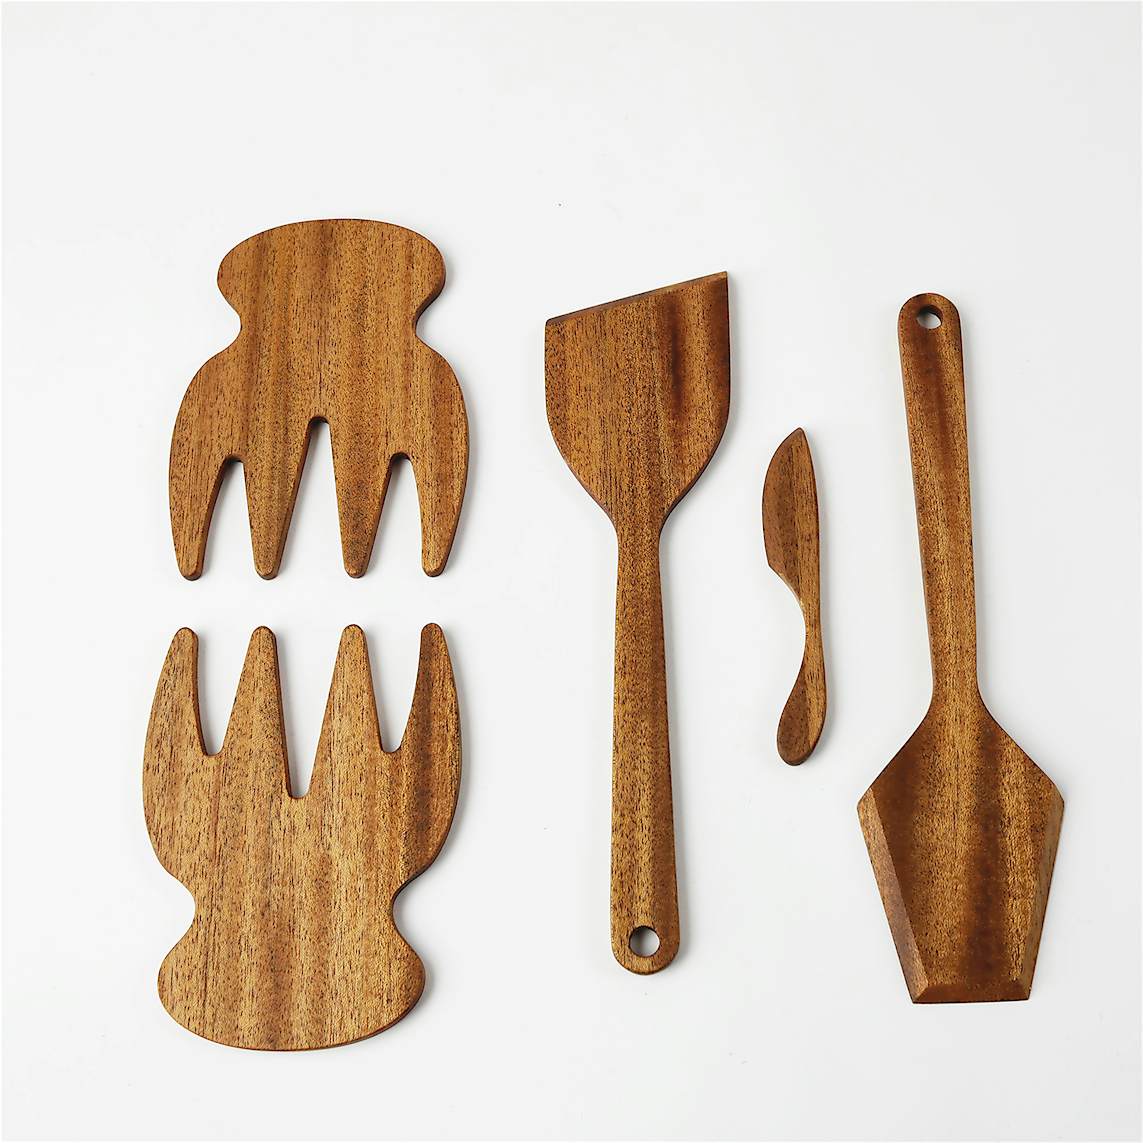
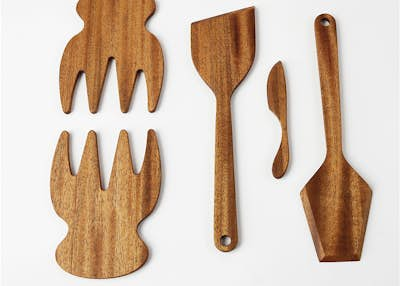
Kitchen Utensils
By Shaper|BY-NC-SA 4.0 License|Created January 25th, 2018


30 min
Easy
80
Prepare your work table
Set up your spoilboard on top of your work table.
In the area you will be cutting, apply double-sided tape about ½” apart on the back of your hardwood. You can either clamp or tape down your plywood. Remove backing from the tape and stick down to your spoilboard.
Clamp the material and spoilboard together securely to the work table.
Setup your workspace in Origin
Apply ShaperTape on the plywood in the area that the camera will be tracking while cutting. For this design, we recommend at least 10 in. x 15 in. of taped work surface above your cut area.
Scan your work surface and Place the design file in the workspace along the bottom long edge of your material.
Once placed, test your placement by hovering over the edges of your design with the tool to make sure you will be able to complete all cuts without running into clamps, edges, or losing view of ShaperTape.
Install ¼” Up-Cut Bit
Install the ¼” Up-Cut Bit.
On screen, update the following:
Bit size: ¼” (0.25 in.)Z touch to calibrate the new bit height to your workspace
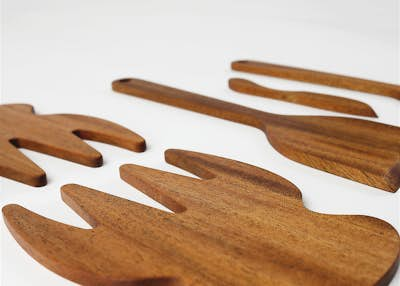
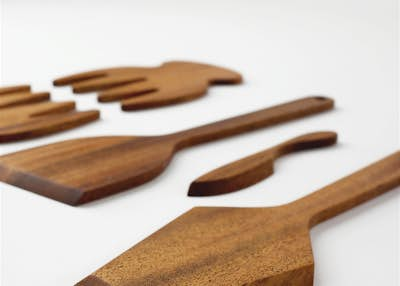
Step cut the edges of the spatulas and spreader knife
You will use a step-cutting technique to cut the chamfered edges of the two spatulas and butter knife. This will allow you to easily sand down the edges to smooth 45 degree angles by hand.
There are three on-line cuts for each step-cut. Contrary to many other cut techniques, we will start with the deepest cut first and then step our way up to the shallowest cuts.
The sequence of step cuts is important here, so make sure to take extra care to select the intended cut line in each of the following steps.
Cut outermost step cut lines on the spatulas and knife
When zoomed into the design you will notice that there are three step-cut lines that are placed very close together and extend out past the geometry of the utensils.
When hovering over these lines it will appear that the bit width may wipe out the rest of the lines when you make your cuts. This is part of the design, and you can rest assured that it will all work out as we progress through the following steps.
Hovering over the outermost cut line, use the following settings to make your first step cut:
Depth: 0.185 in.Cut type: On lineOffset: 0 in.Bit size: ¼” (0.25 in.) Spindle speed (off screen): 5
Cut out the outermost edges on all three utensils.
Cut middle step cut lines on the spatulas and knife
Move to the middle step cut line (which also overlaps with the utensil outlines), and use the following settings to make your cuts:
Depth: ⅛” (0.125 in.)Cut type: On lineOffset: 0 in.Bit size: ¼” (0.25 in.) Spindle speed (off screen): 5
Cut out the middle step-cut line on all three utensils.
Cut innermost step cut lines on the spatulas and knife
Move to the step-cut line closest to the center of the utensil, and use the following settings to make your cuts:
Depth: 0.0625 in.Cut type: On lineOffset: 0 in.Bit size: ¼” (0.25 in.) Spindle speed (off screen): 5
Cut out the innermost step-cut line on all three utensils.
Rough cut exterior contours of each utensil
Make a rough pass around all of the exterior utensil shapes. Hover over the edge of the exterior shapes and use the below settings to make your cuts.
Depth: 0.23 in. Cut type: OutsideOffset: 0.03 in. Bit size: ¼” (0.25 in.) Spindle speed (off screen): 5
Finish cut the exterior contours of each utensil
In order to clean up the edges, make a finish pass around each utensil shape. Hover over the edge of the shapes and update the following settings to make your finish cuts:
Depth: 0.27 in. Cut type: OutsideOffset: 0 in.Bit size: ¼” (0.25 in.) Spindle speed (off screen): 5
Make finish passes around each shape, going slowly towards the end of each cut to prevent the pieces from popping loose and getting damaged by the spindle.
Sanding + finishing touches
Carefully pop the utensils off of the spoilboard. Use a flat sanding block to smooth the stepped-cuts down to a chamfered edge.
Clean up any other edges with 180 grit sand paper and apply a food safe finish.
And you're done!
Congrats on making your beautiful new set of kitchen utensils!