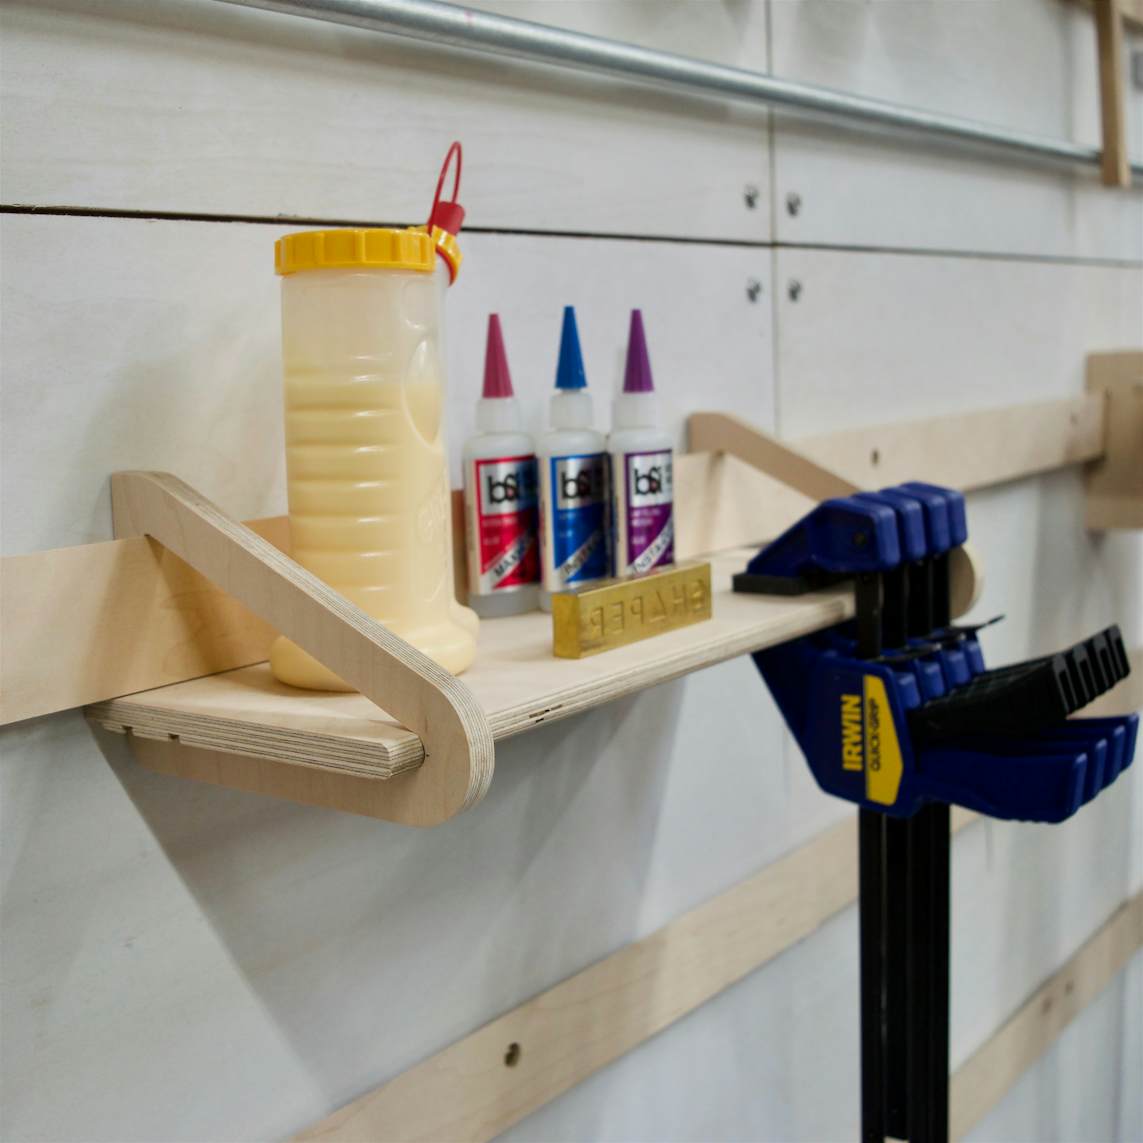
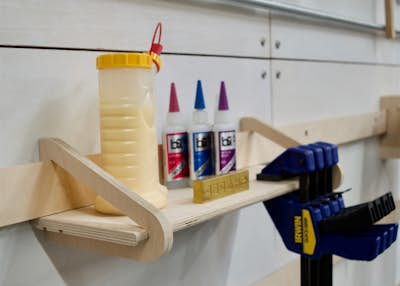
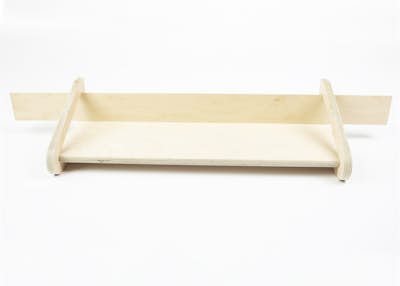
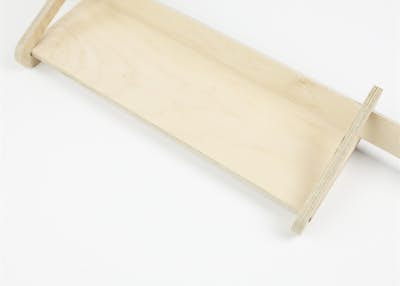
Cleat Shelf
By Shaper|BY-NC-SA 4.0 License|Created December 12th, 2017


10 min
Easy
196

Pre-requisite for this design
This shelf is designed to work with a wall-mounted cleat system. The cleats are made out of ¾” plywood that is 2¼” tall, with a 45 degree angle facing the wall.

Prepare your work table
Setup your spoilboard on top of your work table.
Apply double-sided tape about 2 in. apart on the back of your material, in the area you will be cutting. Remove backing from the tape and stick down to your spoilboard.
Measure the thickness of your plywood, as sometimes it is not exactly ½”.
Clamp the material and spoilboard together securely to the work table.

Setup your workspace in Origin
Apply ShaperTape to your material in the area that the camera will be tracking while cutting. For this design, we recommend at least 20 in. x 34 in. of taped work surface above your cut area.
Scan your work surface and Place design file in the workspace along the bottom long edge of your plywood.
Once placed, test your placement by hovering over the edges of your design with the tool to ensure you will be able to complete all cuts without running into camps, edges, or losing the view of the ShaperTape.
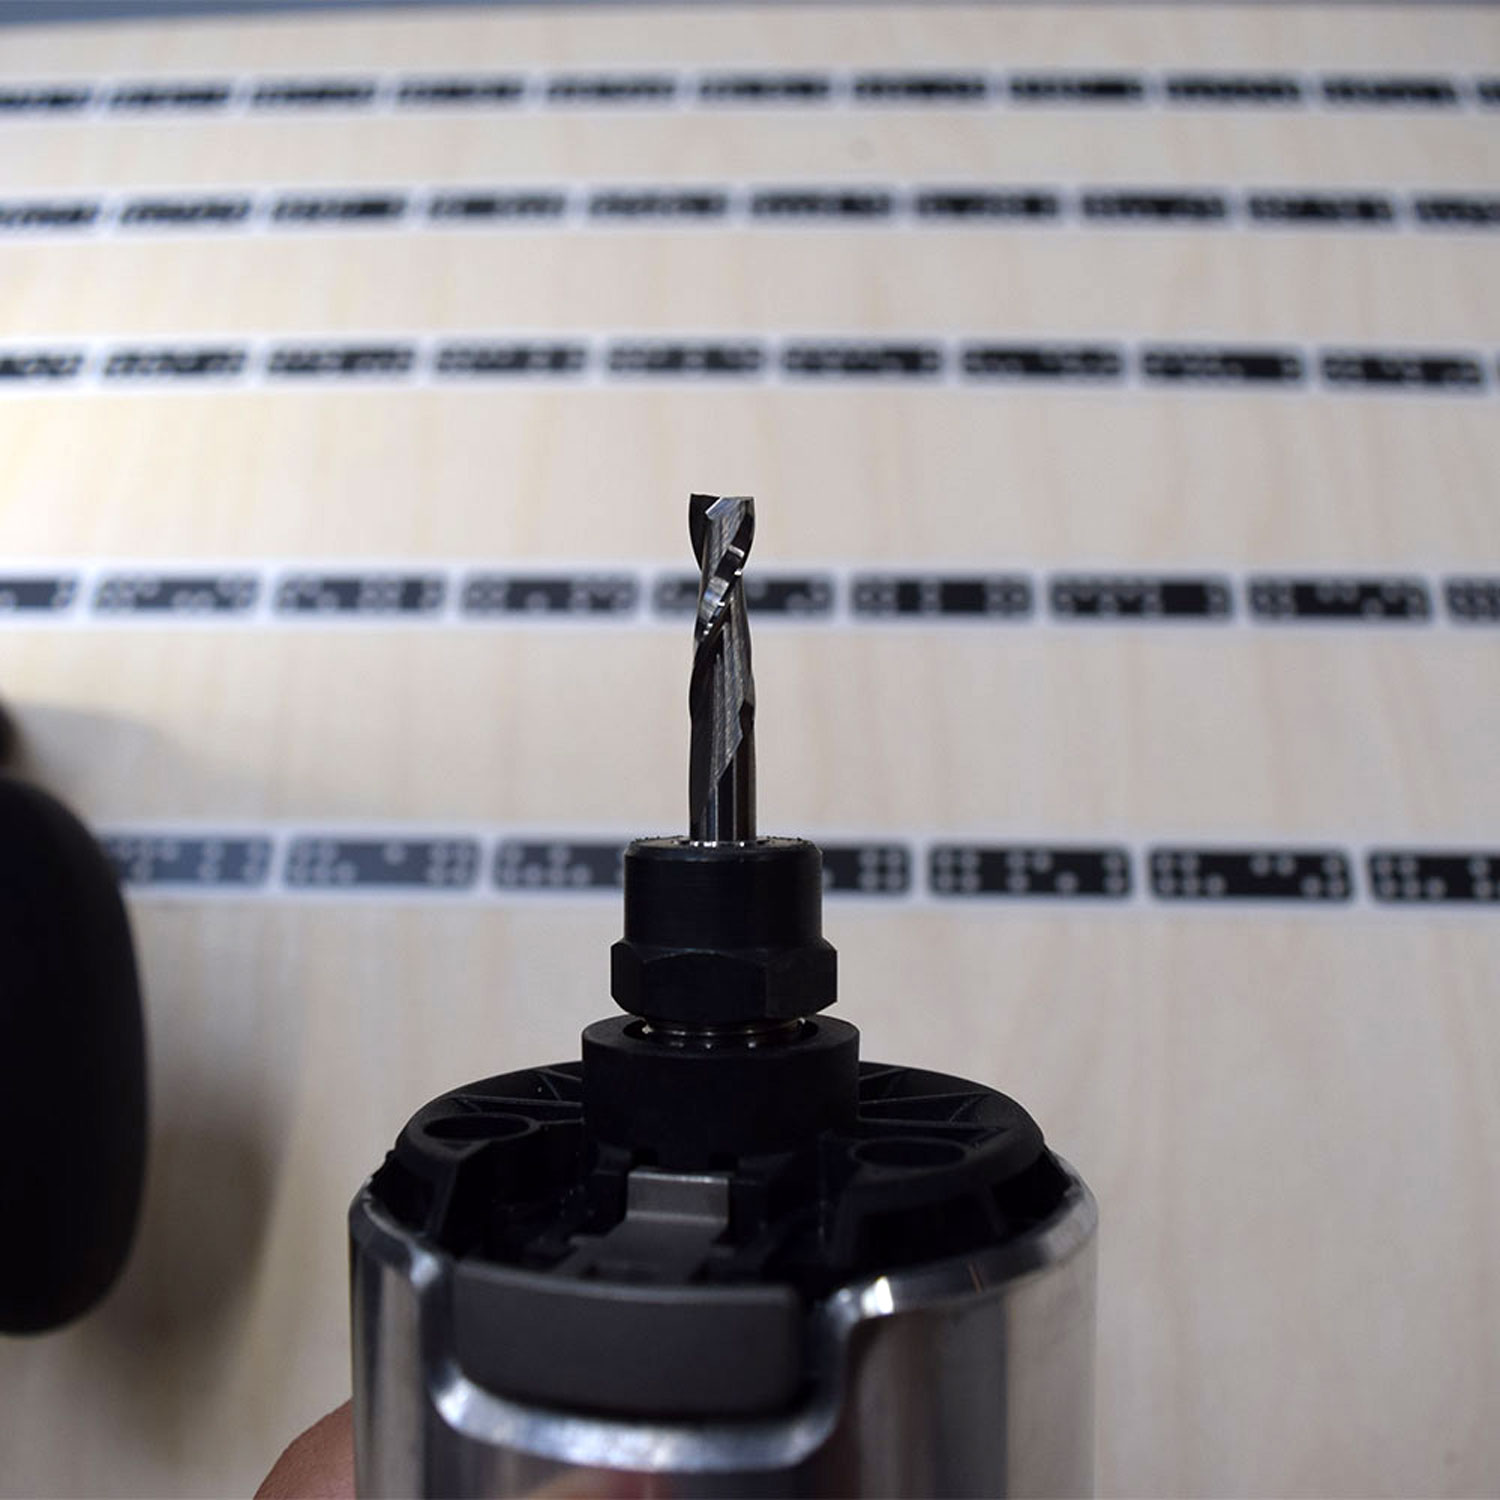
Install ¼” Up-Cut Bit
Install the 1/4" Up-Cut Bit.
On screen, update the following:
Bit size: 1/4" (.25 in.)
Z touch to calibrate the new bit height to your workspace
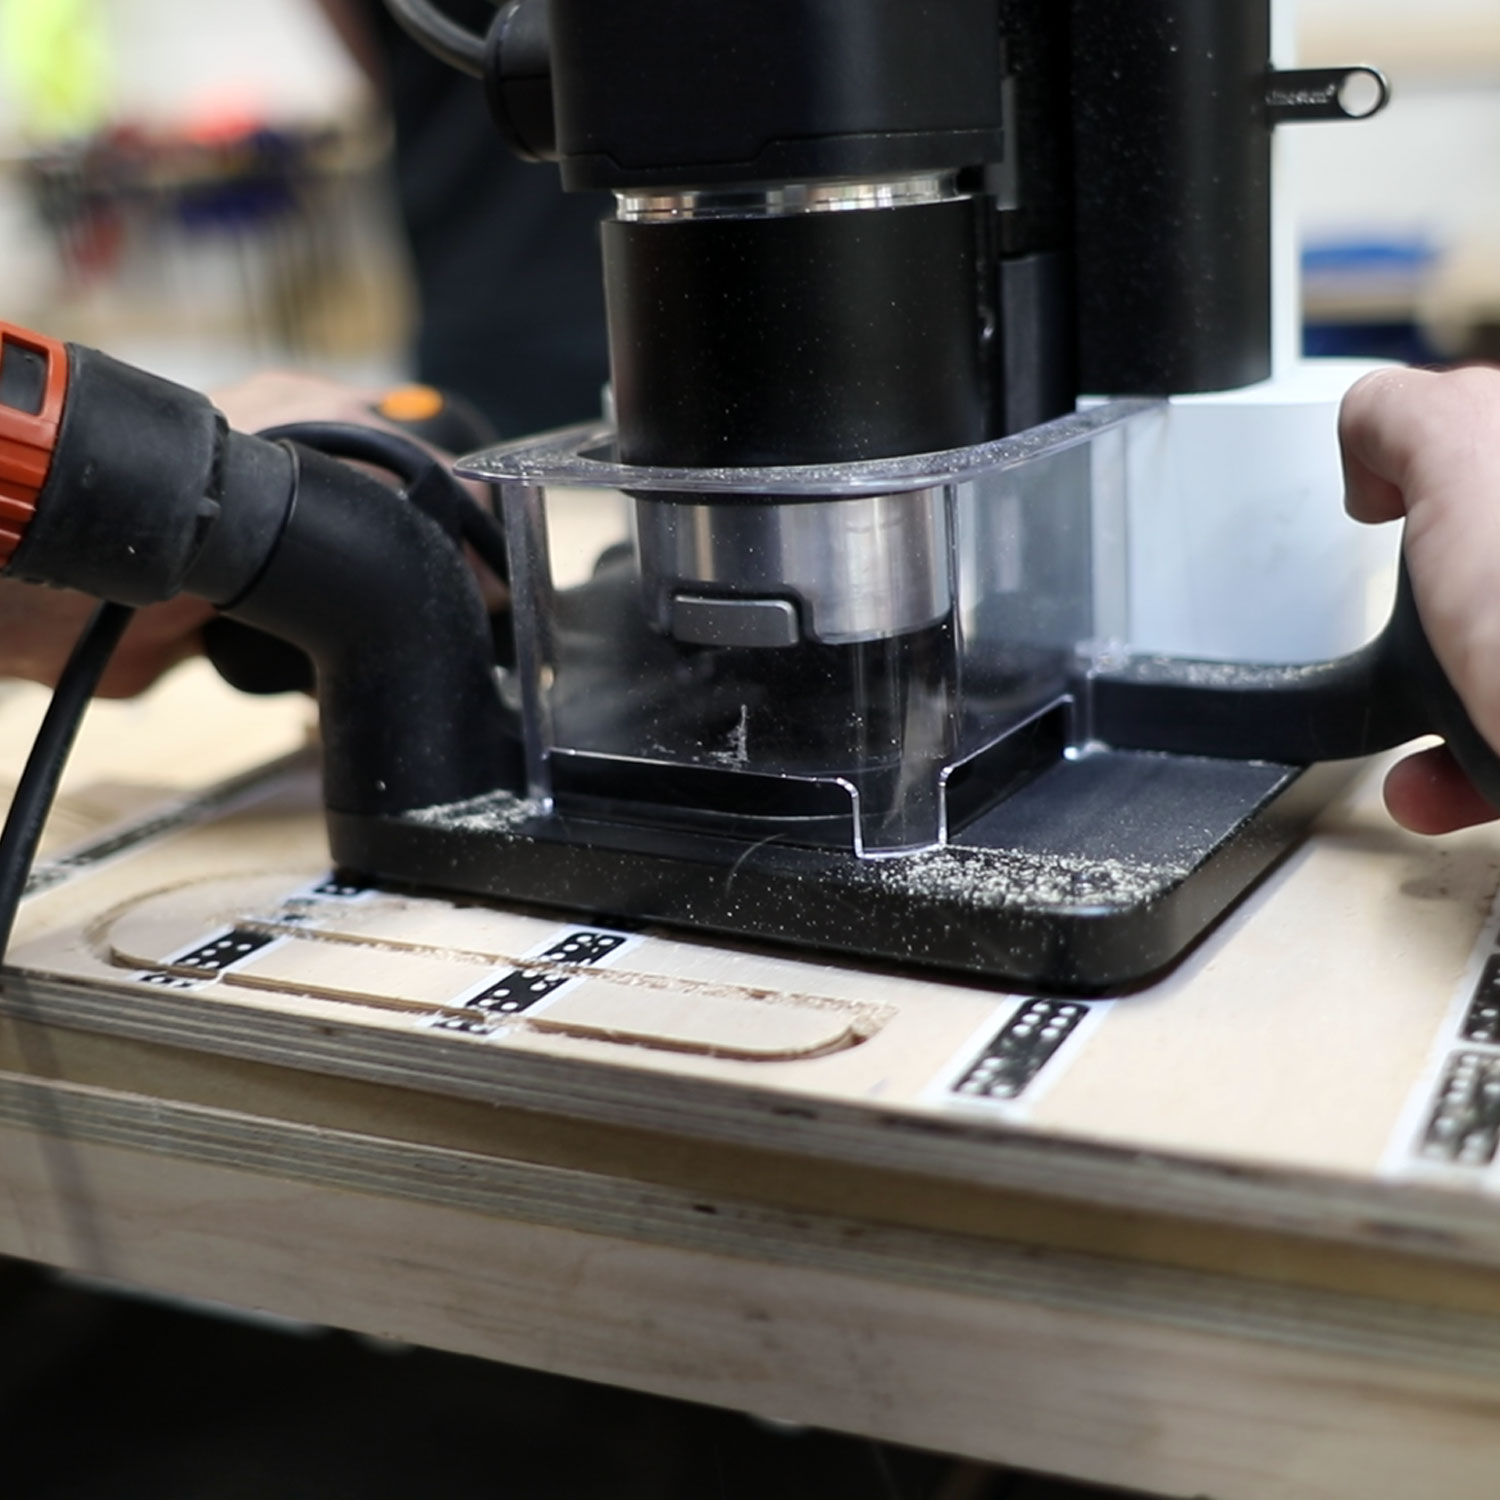
Rough cut each shape
For each shape in this design, we will make three cuts - two roughing cuts, leaving a “skin of material on the bottom,” and then a finishing cut to clean up the edges and cut through the depth of the material (in the next step).
Hover over the edge of one of the brackets and update/confirm your cut settings. Make Rough pass #1 around all three shapes, then update to the settings below, and repeat for Rough pass #2. Vacuum out any chips left in the cuts after each pass.
Rough pass #1:
Depth: 0.25 in.
Cut type: Outside
Offset: 0.01 in.
Bit size: 1/4" (.25 in.)
Spindle speed (off screen): 5
Rough pass #2:
Depth: 0.47 in. (adjust this value if your ply didn't measure 0.5 in.)

Finish cut each shape
In this step we will make a finish pass without an offset through the full depth of the material in order to clean up the edges and cut the design fully out.
Update depth setting as follows, and make your finish pass around all 3 shapes.
Depth: 0.51 in. (adjust this value if your ply didn’t measure 0.5 in.)
Cut type: Outside
Offset: 0 in.
Bit size: 1/4" (.25 in.)
Spindle speed (off screen): 5
Vacuum out any chips left in the cuts.

Round over the top and bottom of the front edge of the shelf
Clamp the shelf securely to a bench. Use a hand router with a ¼” radius roundover bit to round over the top and bottom of the front edge (one of the long edges)
Roundover demonstration: demonstration:
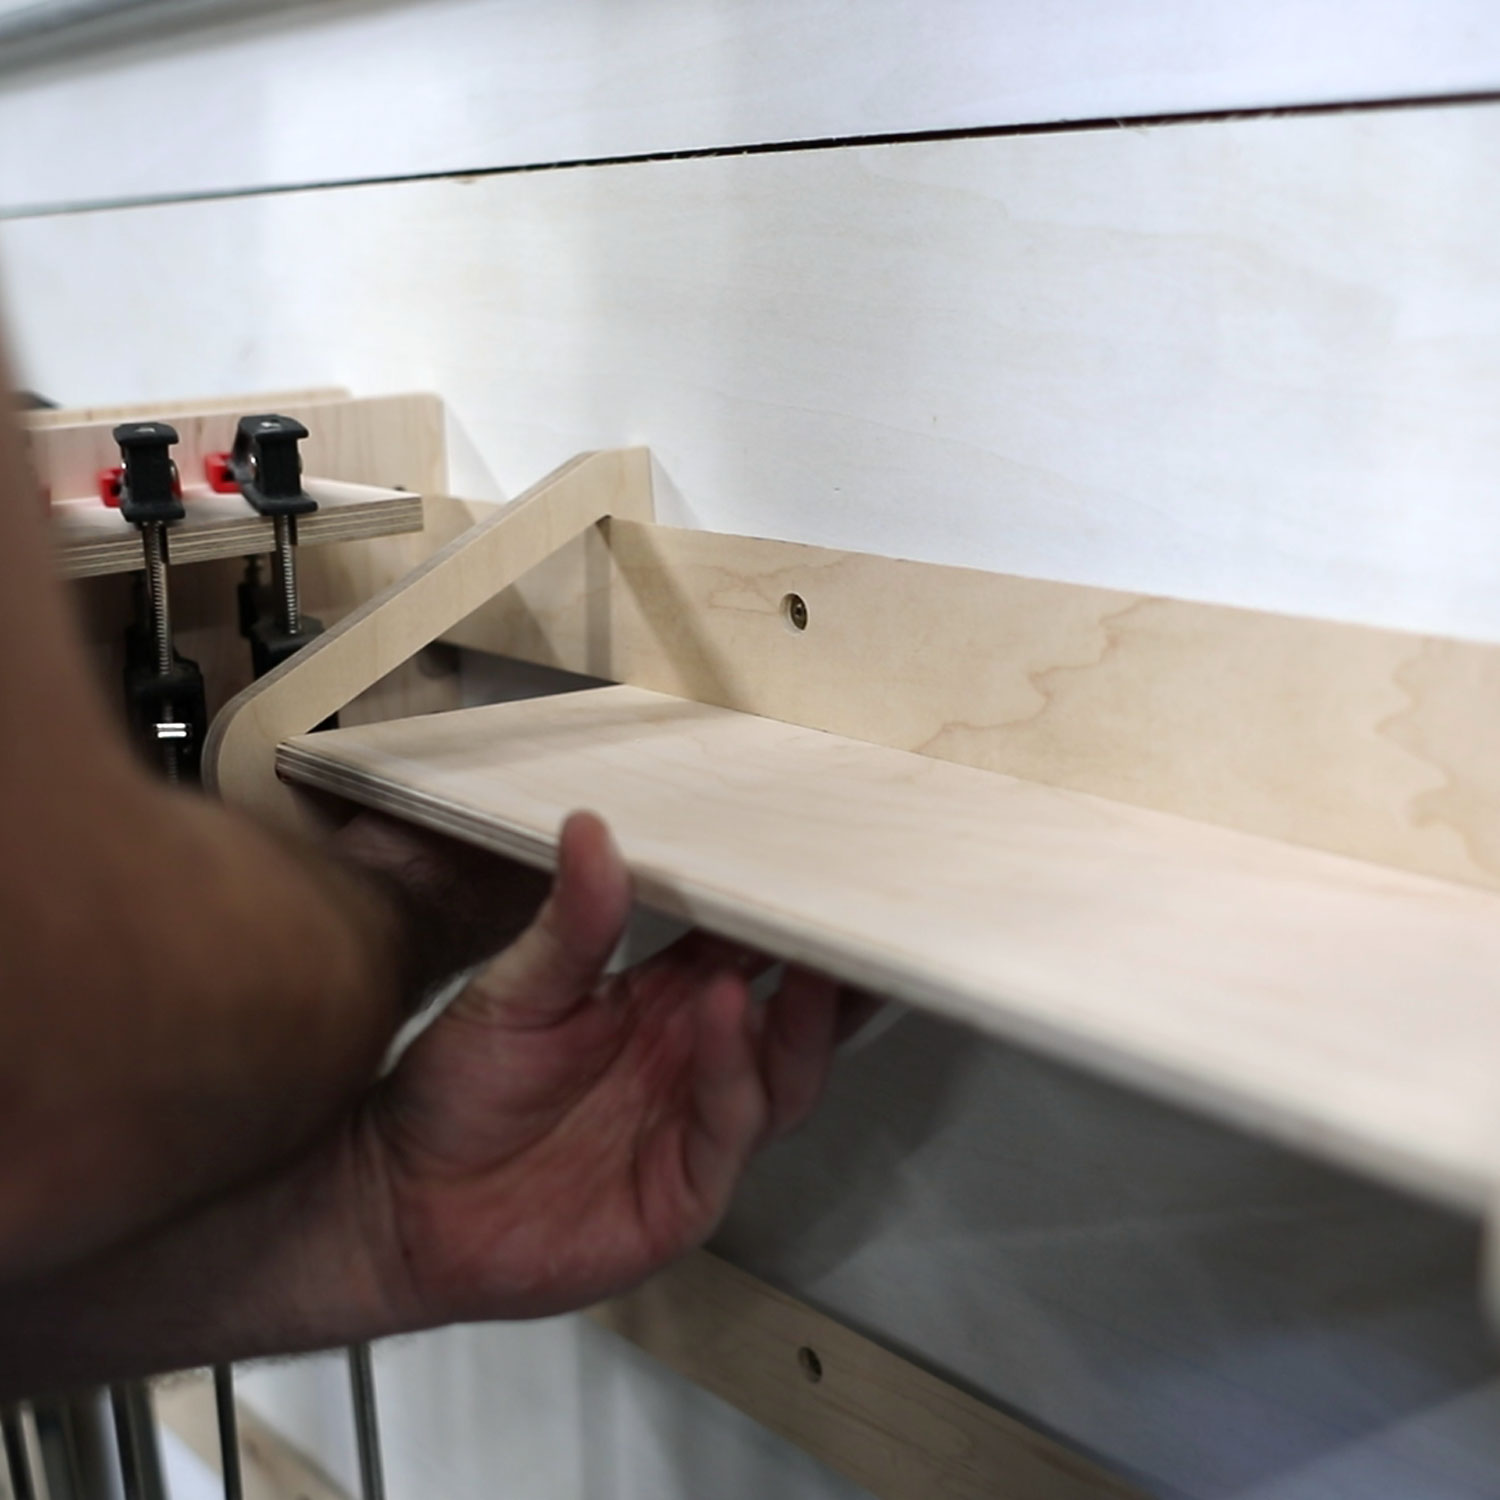
Assemble components on your cleat wall
Raise the shelf up to the underside of a cleat with the rounded edge forward. Attach the brackets to the cleats then press them sideways onto the shelf.

Glorious
Cleat shelf complete!
Time to start organising the shop.