Cleat Clamp Rack
By Shaper|BY-NC-SA 4.0 License|Created December 5th, 2017


30 min
Easy
153

Pre-requisite for this design
This shelf is designed to work with a wall-mounted cleat system. The cleats are made out of ¾” plywood that is 2¼” tall, with a 45 degree angle facing the wall.
Prepare your work table
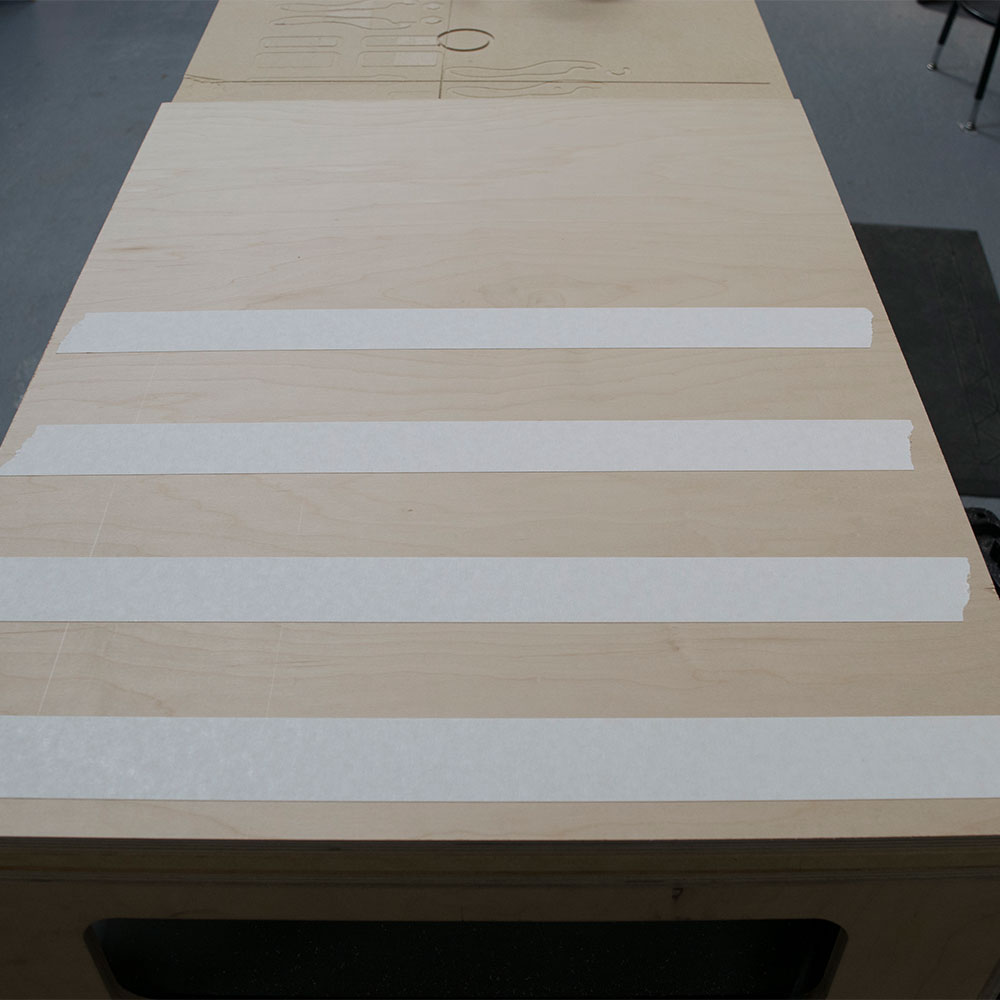
Setup your spoilboard on top of your work table.
In the area you will be cutting, apply double-sided tape about 3 in. apart on the back of your material. Remove backing from the tape and stick down to your spoilboard.
Clamp the material and spoilboard together securely to the work table.

Setup your workspace in Origin
Apply ShaperTape to your material in the area that the camera will be tracking while cutting. For this design, we recommend at least 24 in. x 24 in. of taped work surface roughly 3 in. apart.
Scan your work surface and Place design file in the workspace along the bottom short side of your material. Rotate the design to fit, if needed. There should be about an inch of space on either side.
Once placed, test your placement by hovering over the edges of your design with the tool to make sure you will be able to complete all cuts without running into clamps, edges, or losing the view of the ShaperTape.

Install ¼” Up-Cut Bit
Install the ¼” Up-Cut Bit.
On screen, update the following:
Bit size: 1/4" (.25 in.)
Z touch to calibrate the new bit height to your workspace
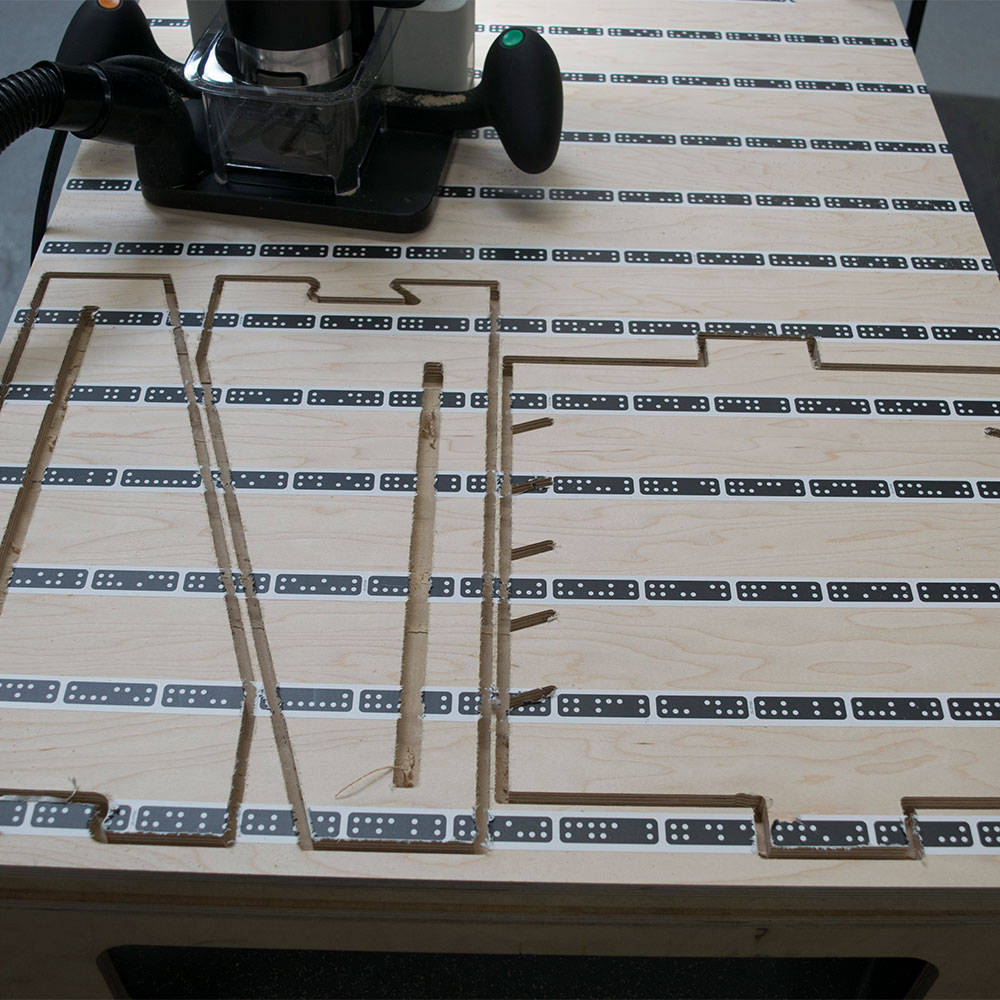
Rough cut exterior contours and bracket slots
In this design we will be making 2 types of cuts: Outside cuts for the exterior contours of the 3 pieces and Inside cuts for the bracket slots. We will make 2 rough passes to cut to the depth of the material in this step, and the follow with a finish pass in the next step.
Hover over the edge of one of the bracket slots or exterior contours and update/confirm the below settings. Note the Cut Type will update automatically between the bracket slots and exterior contours.
Rough pass #1:
Depth: 1/4" (.25 in.)
Cut type: Outside (for exterior contours) or Inside (for interior contours)
Offset: 0.01 in.
Bit size: 1/4" (.25 in.)
Spindle speed (off screen): 5
Rough pass #2:
Depth: 1/2" (.5 in.)

Finish cut exterior contours and bracket slots
In order to clean up the edges, we will make a finish pass without an offset around each shape.
Hover over the edge of one of your cuts and update/confirm the following settings:
Finish pass:
Depth: 1/2" (.25 in.)
Cut type: Outside (for exterior contours) or Inside (for interior contours)
Offset: 0
Bit size: 1/4" (.25 in.)
Spindle speed (off screen): 6
Be aware that the corner "dogbones" were not cut in the previous steps, so will put more resistance on your cutter in this pass. Be sure to hold the tool firmly and use the Auto feature when entering the corners of the dogbone cuts.
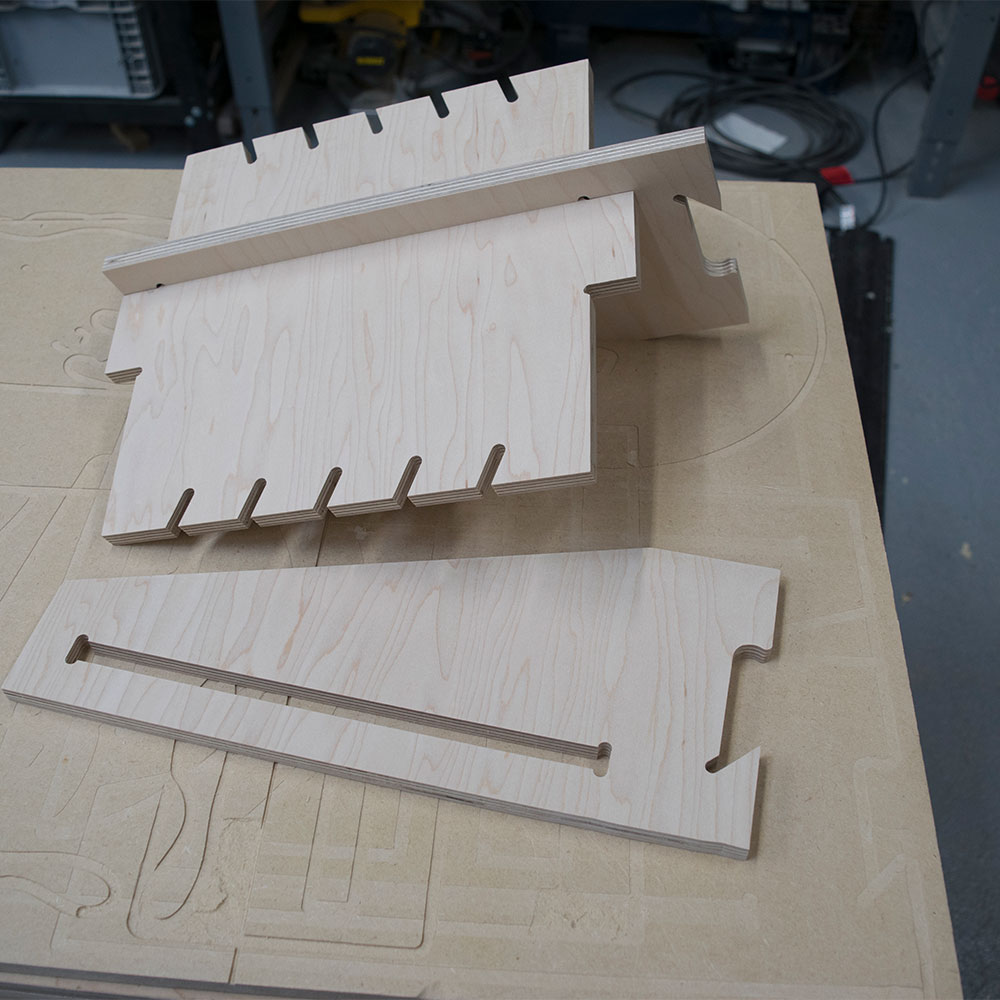
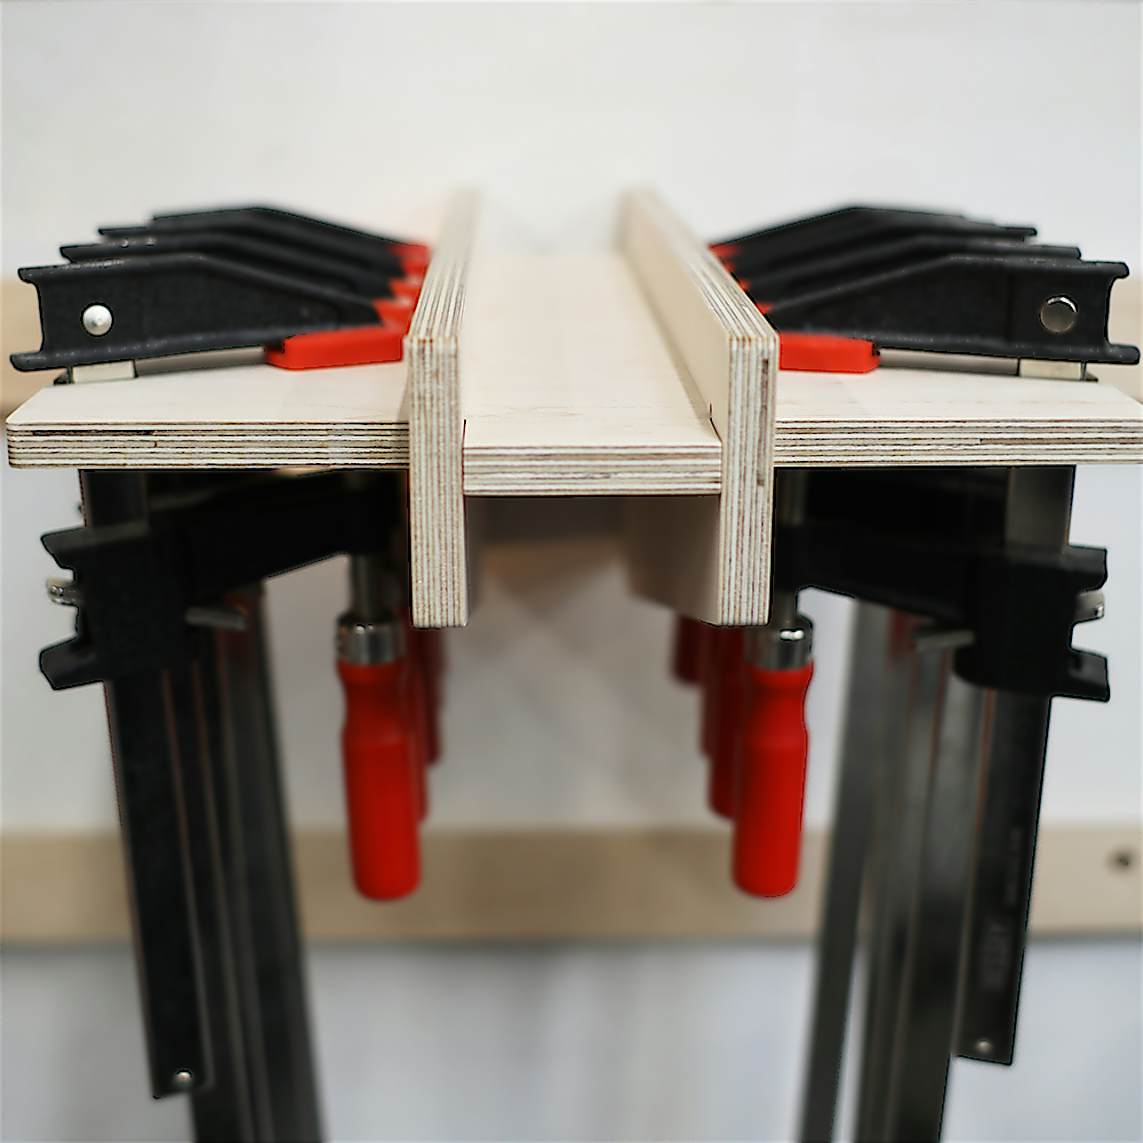
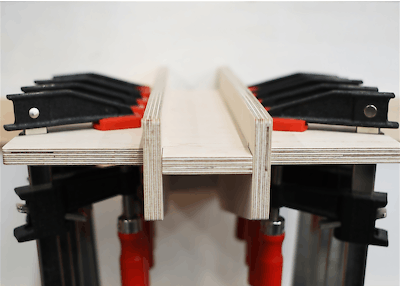
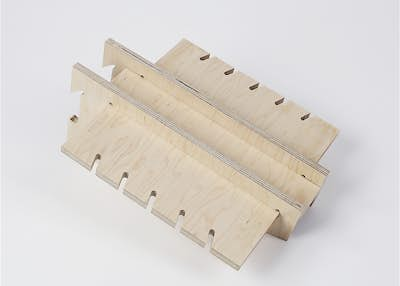
Assemble the clamp rack
Pop the designs out from your workstation.
Sand edges with 180 grit to get rid of any fuzz.
Use a rubber mallet to hammer the top piece into the slots on the 2 brackets. One bracket on either side.
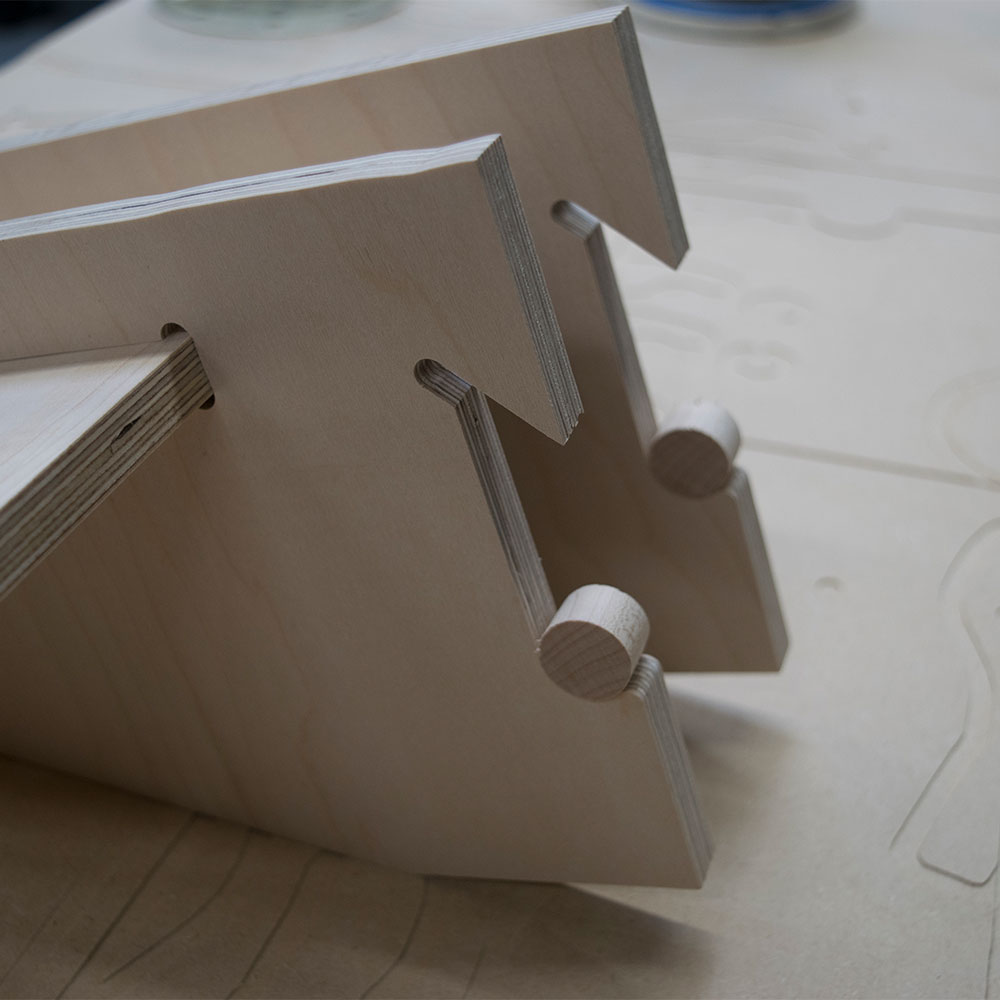
Cut dowel rod to size
Using a hand saw, cut 2 pieces of 3/4" dowel to 1/2" long. These will be used to secure your clamp rack once it has been hung on a cleat.
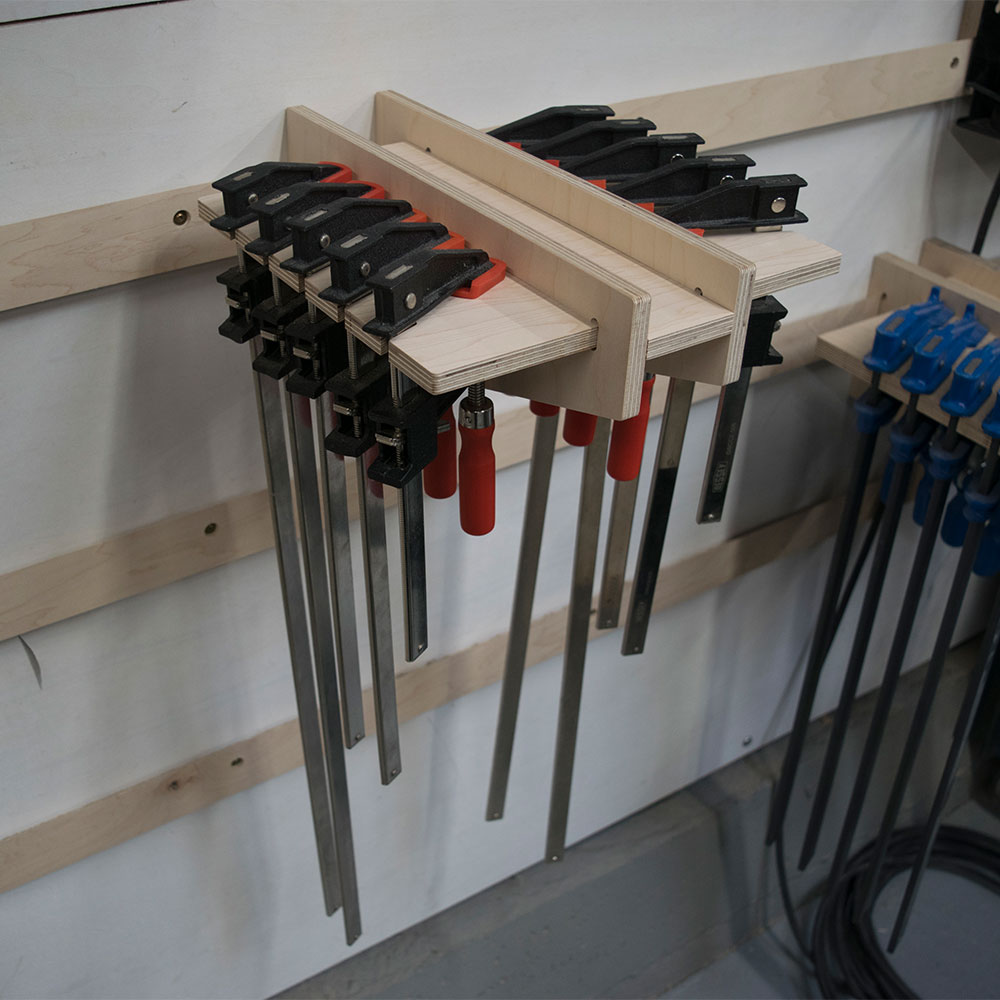
Congrats
You've completed the project. Nice work!
Go put your clamps away now ;)