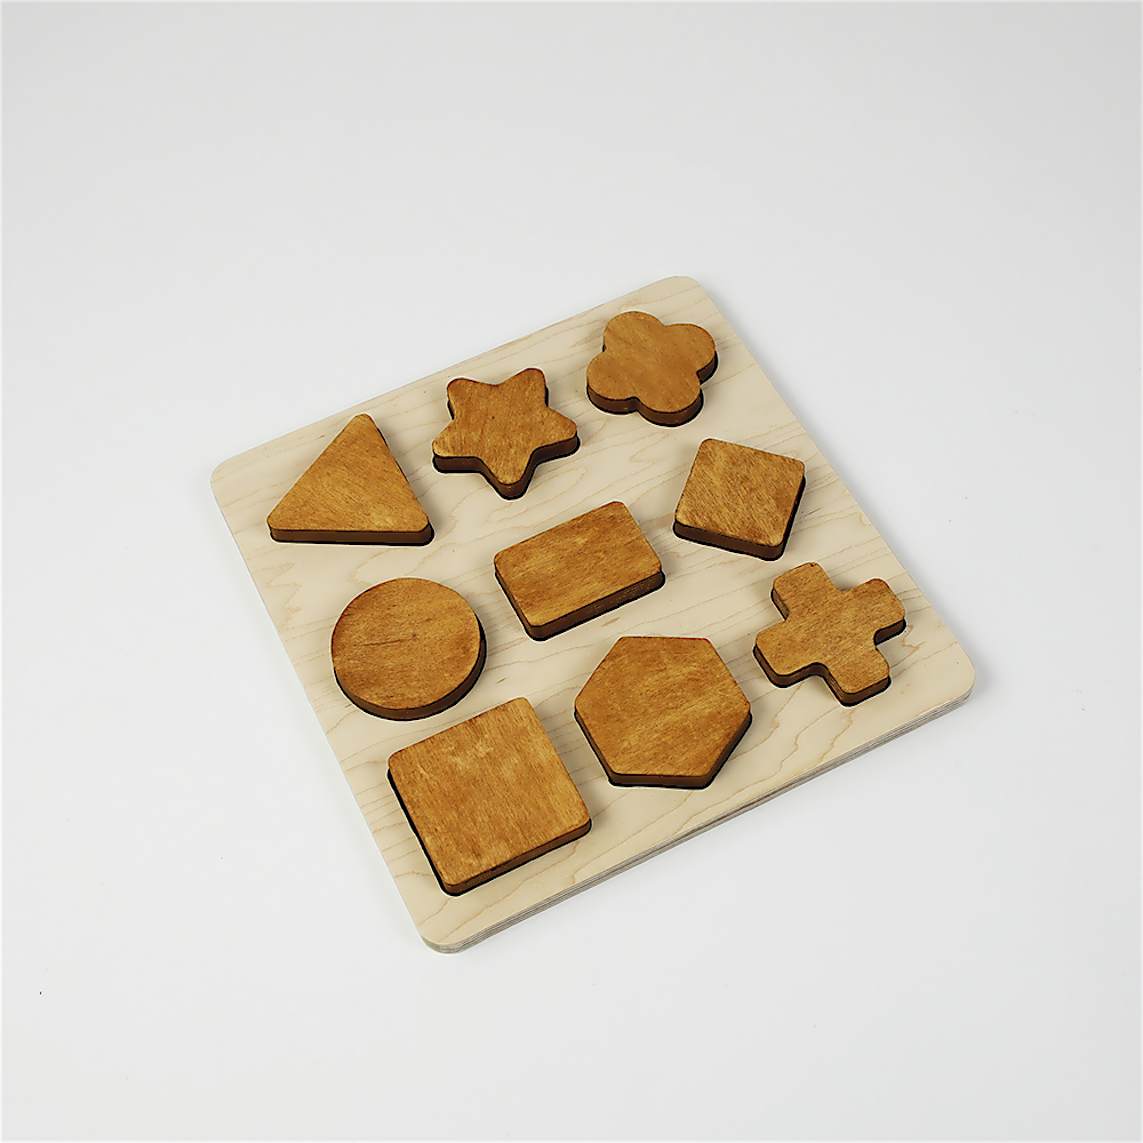
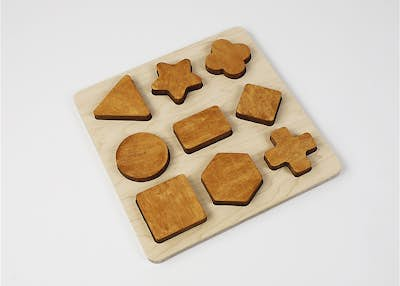
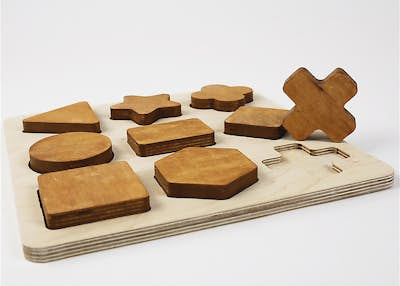
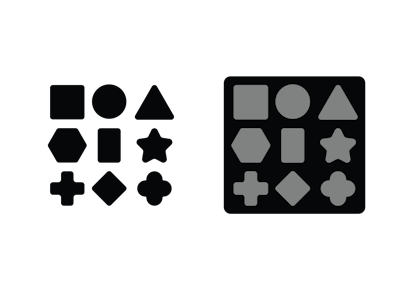
Shape Puzzle
By Shaper|BY-NC-SA 4.0 License|Created December 5th, 2017


45 min
Easy
123

Prepare your work table
Setup your spoilboard on top of your work table.
Apply double-sided tape to your ½” and ¾” plywood. The tape should be spaced ~ 2 in. apart on the ¾” plywood and can be 3-4 in. apart on the ½” plywood.
Remove backing from the tape and stick both pieces down to your spoilboard, spaced at least a few inches apart.
Clamp each piece and spoilboard together securely to the work table.
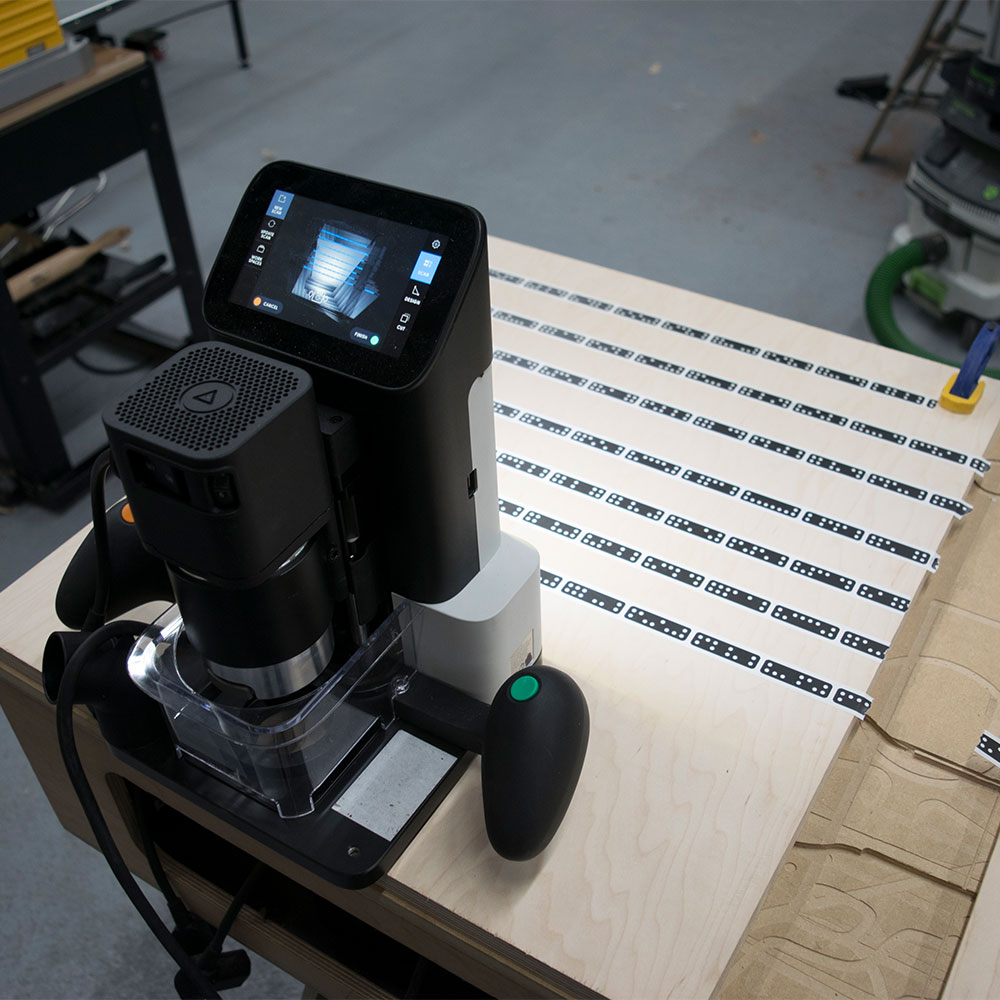
Apply ShaperTape, Scan 3/4" plywood, and Place puzzle pieces
On both pieces of plywood, apply ShaperTape in the area that the camera will be tracking while cutting. For this design, we recommend at least 20 in. x 14 in. of taped work surface above the area you will be cutting.
Scan the 3/4" plywood and Place the puzzle pieces file in the workspace below the ShaperTape.
Once placed, test your placement by hovering over the edges of your design with the tool to ensure you will be able to complete all cuts without running into camps, edges, or losing the view of the ShaperTape.

Install 1/4" Up-Cut Bit
Install the ¼” Up-Cut Bitt.
On screen, update the following:
Bit size: 1/4" (.25 in.)
Z touch: to calibrate the new bit height to your workspace

Cut out the puzzle pieces with 3 rough passes
To cut out the puzzle pieces, we will need to make 3 rough passes, increasing the depth of the cut with each pass. In the last rough pass, we will leave a thin skin on the material, so that the puzzle pieces will not come loose before we can make our finish pass in the next step.
Hover over the edge of one of the puzzle pieces, update/confirm the below settings, and make your cuts.
Rough pass #1:
Depth: 1/4" (0.25 in.)
Cut type: Outside
Offset: 0.02 in.
Bit size: 1/4" (.25 in.)
Spindle speed (off screen): 6
Rough pass #2
Depth: 1/2" (0.5 in.)
Rough pass #3
Depth: 0.72 in. (just below the depth of your material)
Note: The deeper you cut, the longer it takes for the spindle to retract and clear your material. Be careful on the 2nd and 3rd passes to not move your tool while the spindle is retracting to avoid nicking the edges of your shapes.

Finish cut puzzle pieces
In order to clean up the edges and cut the puzzle pieces from the material, you will need need to make a finish pass, without an offset, around each shape.
Hover over the edge of a puzzle piece and update/confirm the following settings:
Depth: .77 in.
Cut type: Outside
Offset: 0
Bit size:1/4" (.25 in.)
Spindle speed (off screen): 6
Make finish passes around each of the puzzle pieces, going slowly towards the end of each cut to prevent the pieces from popping loose and getting damaged by the spindle.

Scan ½” plywood
Move the tool over to the ½” plywood and scan the ¾” plywood and place the puzzle base file in the workspace below the ShaperTape.
Once placed, test your placement by hovering over the edges of your design with the tool to ensure you will be able to complete all cuts without running into camps, edges, or losing the view of the ShaperTape.

Pocket cut the puzzle pieces
Hover over the edge of one of the puzzle pieces confirm/update the following settings:
Depth: 1/4" (0.25 in.)
Cut type: Pocket
Offset: 0
Bit size:1/4" (.25 in.)
Spindle speed (off screen): 6
Pocket cut each of the puzzle pieces. For best results, you may want to apply some downwards pressure on the tool while making your pocket cuts.

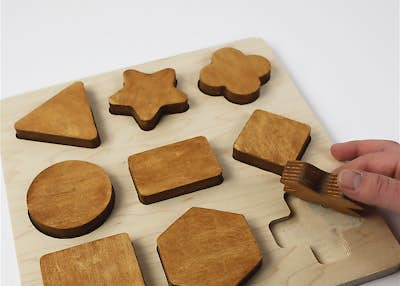
Finish cut the puzzle pockets in 2 passes
Origin automatically offsets pocket cuts, so you will notice that the puzzle pieces will not yet fit into the pocketed shapes. In order to achieve the full dimension of the puzzle pockets, we will make an Inside pass without an offset around the pocketed shapes. This will allow the puzzle pieces to fit very snug (eg: like a butterfly joint).
However, since we are creating a puzzle for children, we will want create a little extra space between the pockets and puzzle pieces so that they can be easily to placed and removed. To achieve this, you will need to make a second Inside pass with a negative offset around each of the pocketed shapes (negative offset on an inside cut = increases the dimension).
Hover over the edge of the pocketed shapes and update/confirm the following settings:
Finish pass #1:
Depth: 1/4" (0.25 in.)
Cut type: Inside
Offset: 0
Bit size:1/4" (.25 in.)
Spindle speed (off screen): 6
Finish pass #2:
Offset: -0.05 in.
Note: If you want the puzzle pieces to be even looser, you can increase the negative offset incrementally (~ 0.2 in. at a time) until you achieve your desired fit. The greater the negative offset, the larger the puzzle pockets will be and thus the looser the pieces will pop in and out of the puzzle.

Rough cut the exterior contour in 2 passes
The puzzle is almost done! To cut the puzzle from the plywood, we will make a rough pass around all the exterior contour of the puzzle and then increase the depth for the second rough pass. In the second rough pass, leave a thin skin on the material so that the puzzle does not pop loose and before we can make our finish pass in the next step.
Hover over the edge of exterior contour of the puzzle, update/confirm the below settings, and make your cuts.
Rough pass #1:
Depth: 1/4" (0.25 in.)
Cut type: Outside
Offset: 0.02 in.
Bit size:1/4" (.25 in.)
Spindle speed (off screen): 6
Rough pass #2
Depth: 0.45 in.
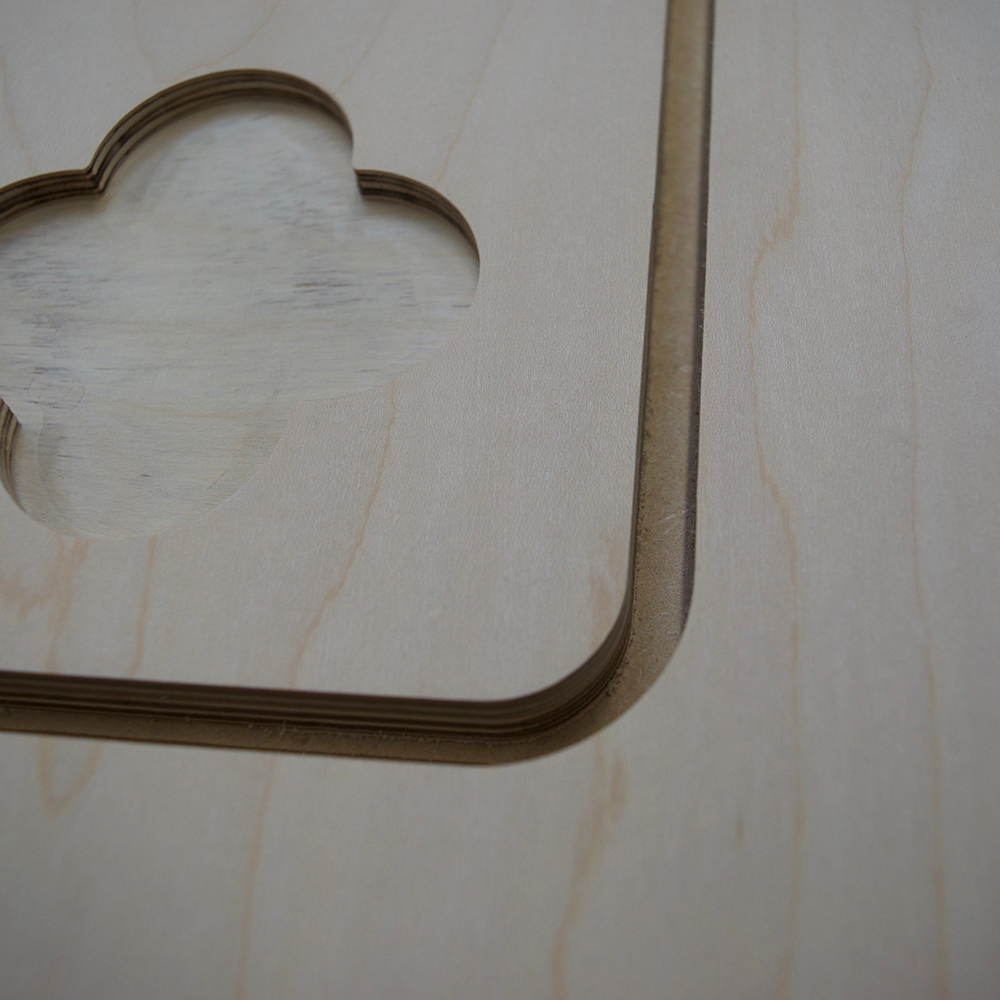
Finish cut the exterior contour
In order to clean up the edges and remove the skin we left on in the previous step, you will need need to make a finish pass around the exterior of the puzzle.
Hover over the edge exterior contour of the puzzle and update/confirm the following settings:
Depth: 0.55 in.
Cut type: outside
Offset: 0
Bit size:1/4" (.25 in.)
Spindle speed (off screen): 6
Make a finish pass around each of the puzzle base, going slowly towards the end of the cut to prevent the puzzle base from popping loose and getting damaged by the spindle.

Finishing touches
Pop the finished pieces off of the spoilboard, removing any remaining tape.
Sand with 180 grit sandpaper to get rid of any "fuzz" and soften the edges so they are no longer sharp.
Apply child safe stain, finish, or paint as desired.

Congrats
You’ve completed the project. Nice work!
Thanks, and happy shaping ;)