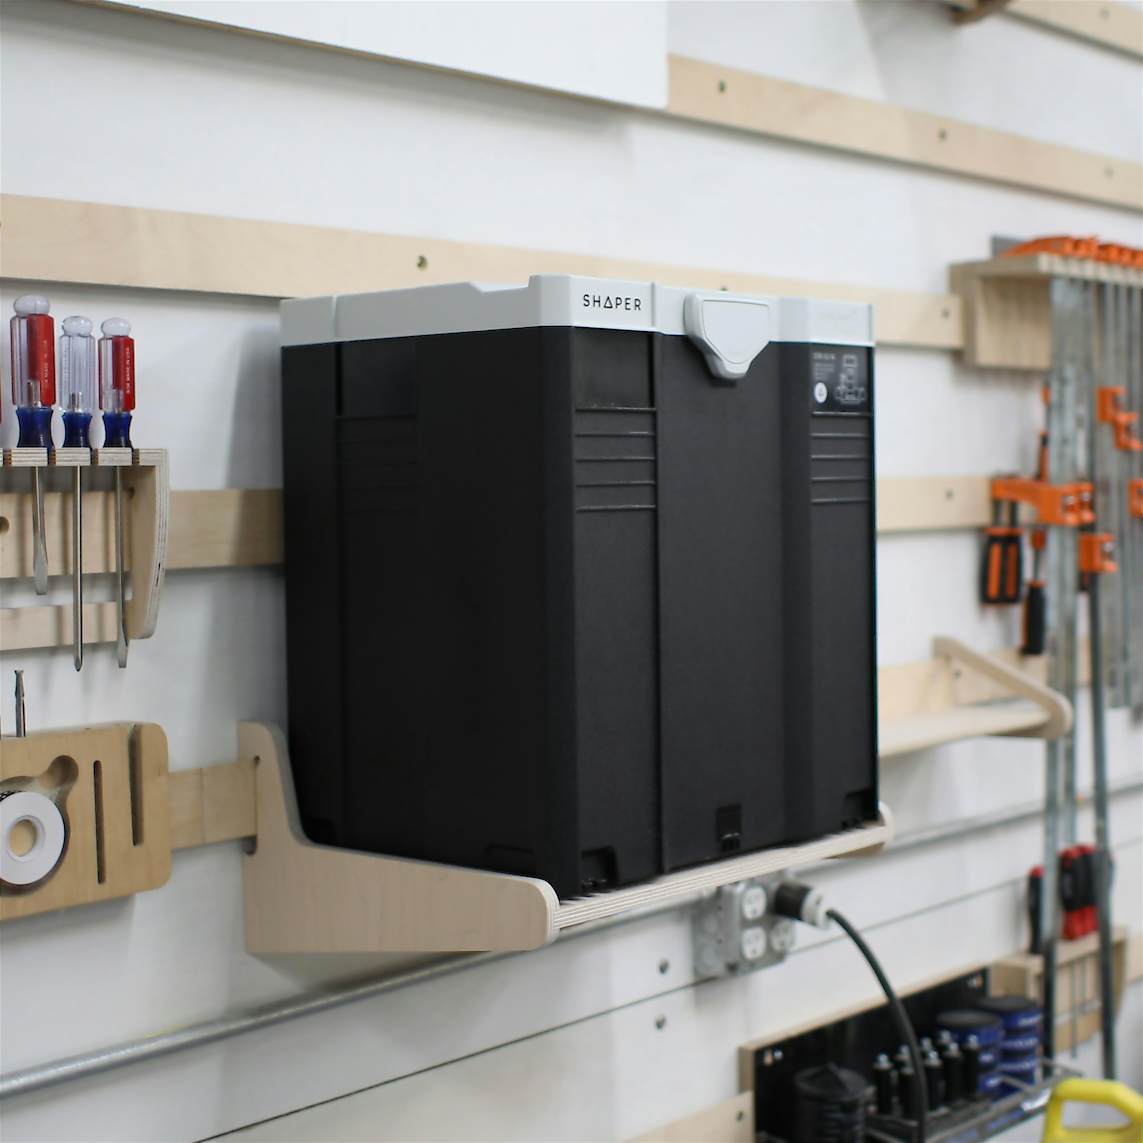
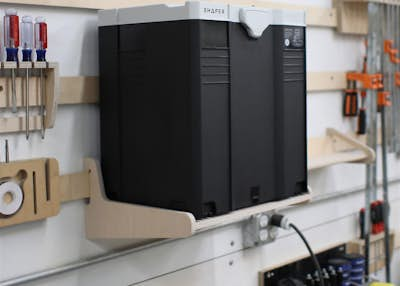
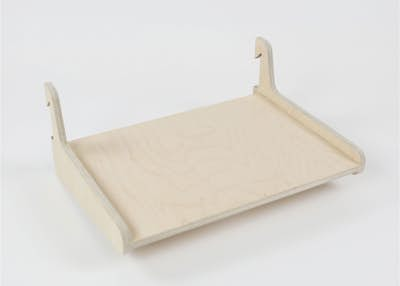
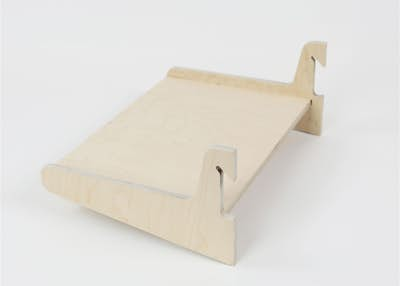
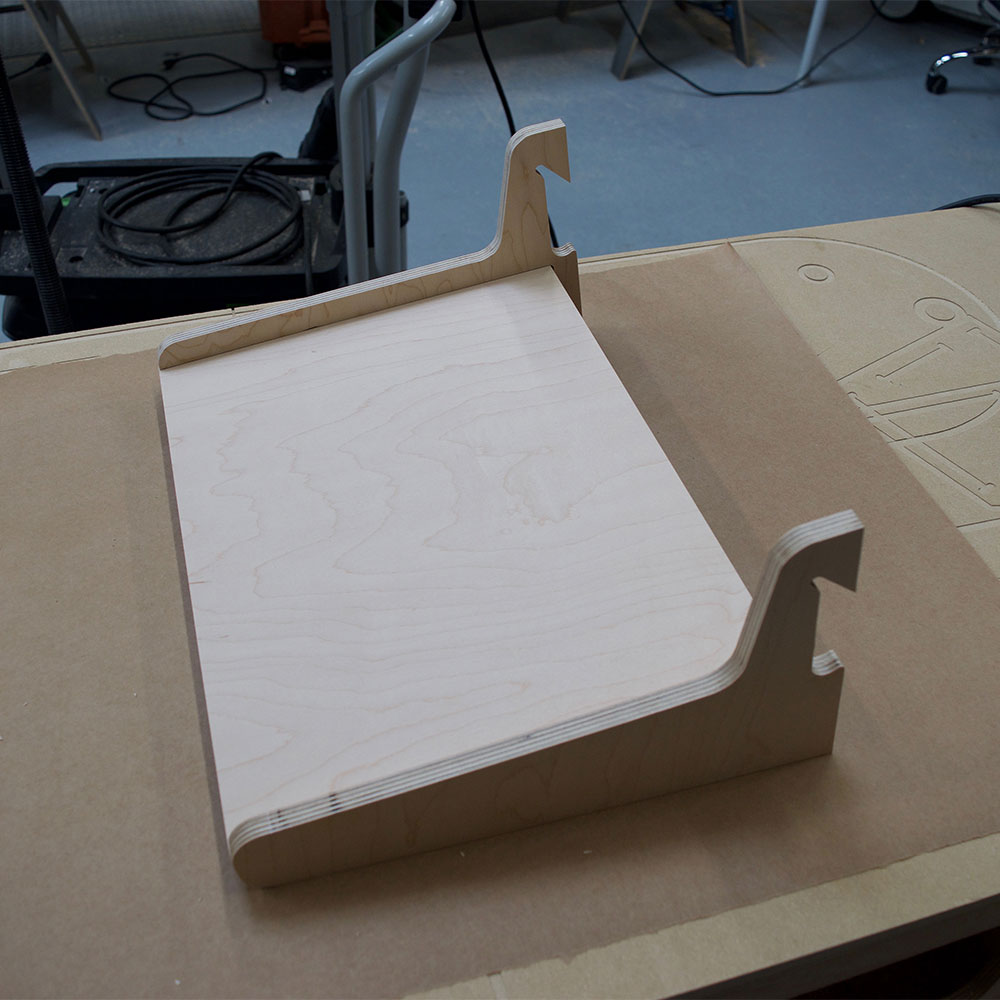
Cleat Systainer shelf
By Shaper|BY-NC-SA 4.0 License|Created October 24th, 2017


30 min
Intermediate
170

Pre-requisite for this design
This shelf is designed to work with a wall-mounted cleat system. The cleats are made out of ¾” plywood that is 2¼” tall, with a 45 degree angle facing the wall.
Prepare your workstation
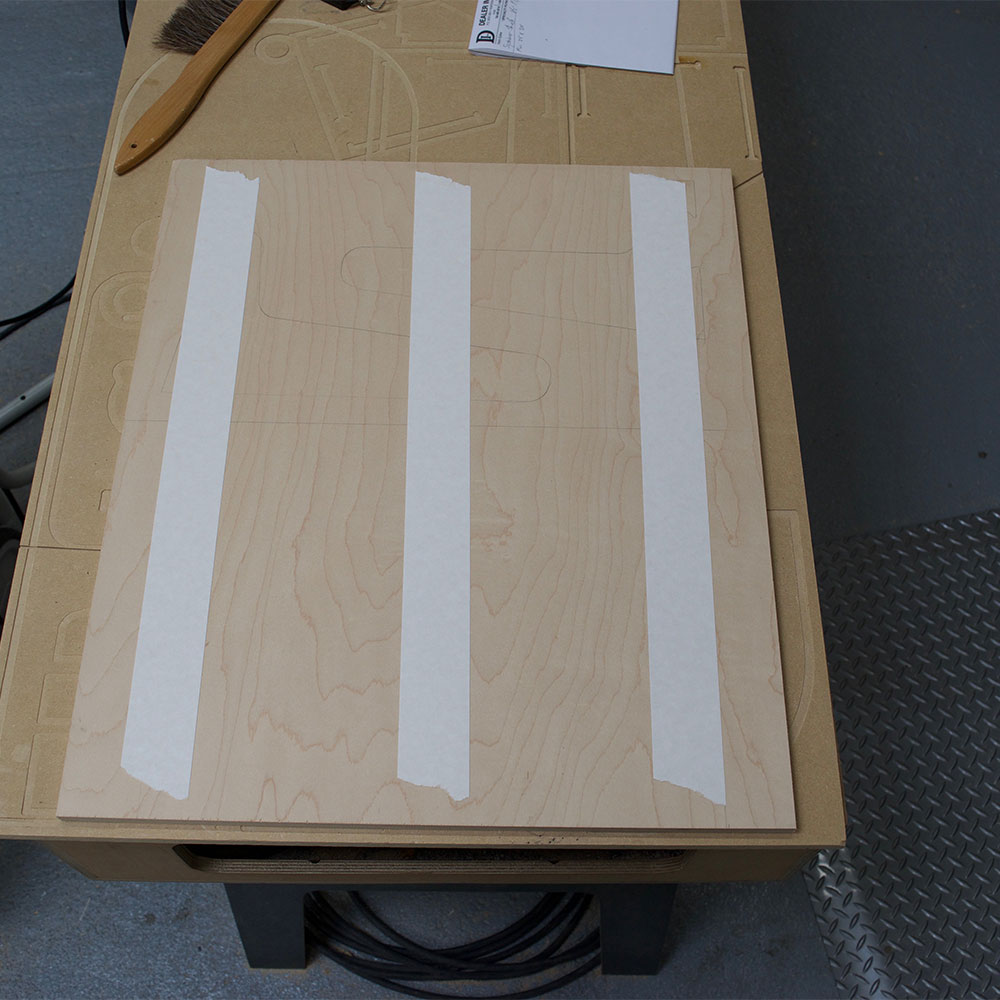
Place your spoilboard on top of your work surface.
Place double-sided woodworking tape about 8in apart on top of your spoilboard in the area that you will be cutting. Then place your ½” plywood on top of the spoilboard.
Clamp the plywood and spoilboard securely to the worksurface.
For more instruction on how to setup your workstation, click here.

Scan your workspace and place your design
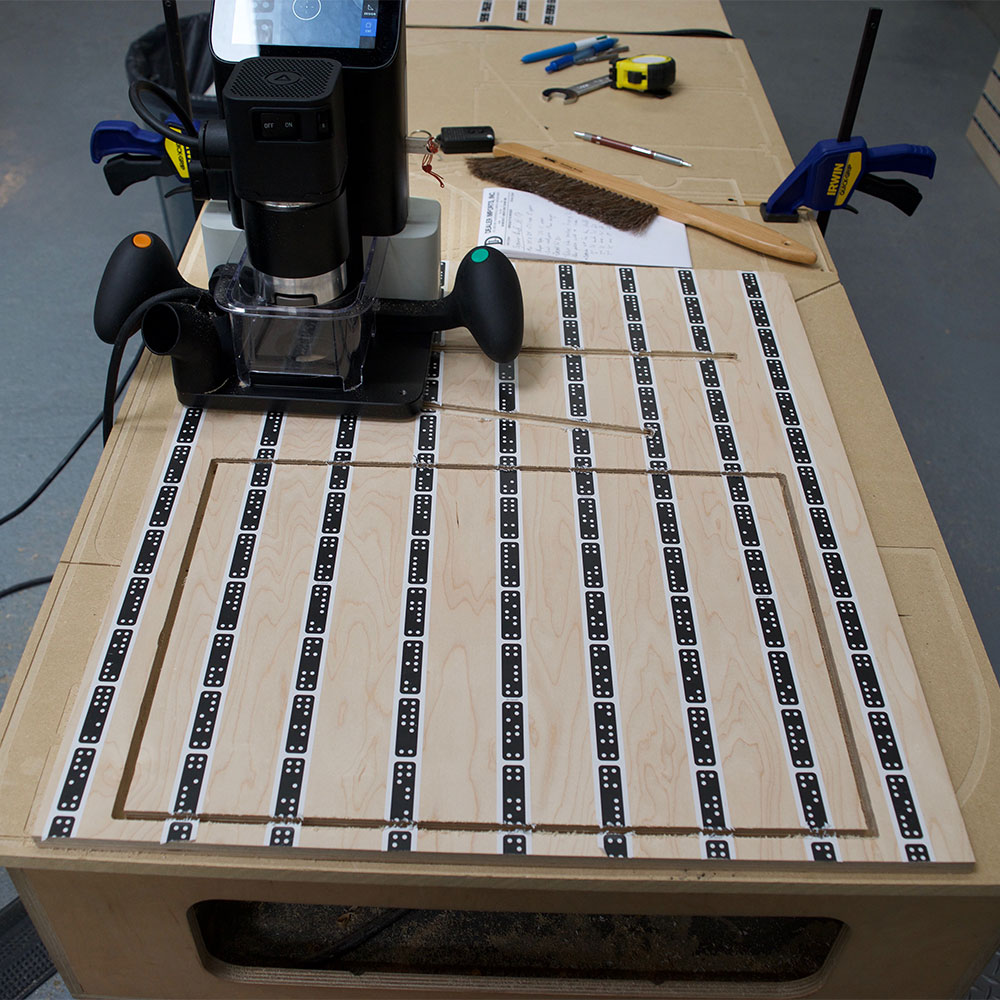
Apply your ShaperTape to the general area that you will be cutting and in the area that the camera will be tracking while cutting. We recommend at least 24in x 20in of taped work surface for this project.
Plug in your Shaper Origin, start a New Scan, and Scan your work surface.
Place your design in the workspace by tapping the “+” button at the top of the left side menu in Design mode.
Once placed, test your placement on the workspace by hovering over the edges of your design with the tool to ensure you will be able to complete all cuts without running into camps, edges, or losing the view of the ShaperTape.
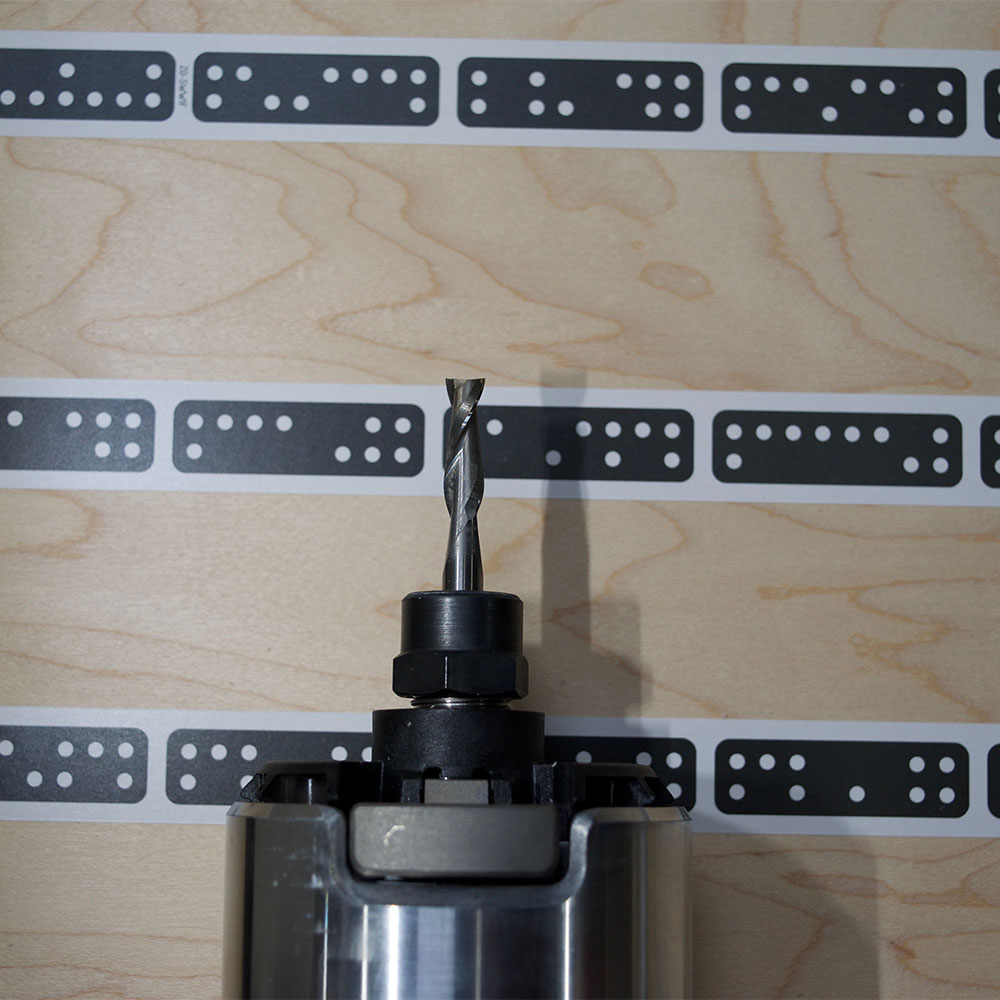
Install ¼” Up-Cut Bit
Unplug and remove the spindle from Origin and install the ¼” Up-Cut Bit into the collet. Re-install the spindle into the tool, plug it back in on the left side.
On screen, update the following:
Bit size: ¼” (.25in)Z touch to calibrate the new bit height to your workspace

Make first cut pass of shelf pockets
You are almost ready to cut! Before you start the cutting, it is important to confirm the correct cut settings.
In this design we will be making 2 types of cuts: pocket cuts for the shelf slots and outside cuts for the exterior contours of the brackets and shelf. We will start with the pocket cuts.
Hover over the edge of the shelf pockets (inside the brackets) and enter/confirm the following settings:
Depth: ¼” (.25in)Cut type: PocketOffset: 0Bit size: .25 inchesSpindle speed (off screen): 6
Cut out the pocket on each bracket, plunging and retracting the spindle between each cut.

Make second cut pass of shelf pockets
Origin automatically offsets pocket cuts, so in order to achieve the final dimension for the joints, you will need to remove the offset.
Hover over the edge of your pocket cuts and update the following settings:
Depth: ¼” (.25in)Cut type: InsideOffset: 0
Make the final cut pass on the pockets on each bracket, plunging and retracting the spindle between each cut.

Update cut settings and make first cut pass on exterior contours of shelf surface
Next we will cut out the shelf surface. Hover over the edge of the shelf contour and update/confirm the following cut settings:
Depth: ¼” (.25in)Cut type: OutsideOffset: .03inBit size: ¼” (.25in)Spindle speed (off screen): 6
Make the first cut pass around the the exterior contour of the shelf.
Update cut settings and make second cut pass on exterior contours of shelf surface
To cut through the depth of the material, hover over the edge of the shelf contour and update/confirm the following cut settings:
Depth: ½” (.50in)Cut type: OutsideOffset: .03inBit size: ¼” (.25in)Spindle speed (off screen): 6
Make the second cut pass around the exterior contour of the shelf.

Update cut settings and make finishing cut pass on exterior contours of shelf surface
In the final finishing pass, we will remove the offset to clean up the edges. Hover over the edge of the shelf contour and update/confirm the following cut settings:
Offset: 0
Make the finishing cut pass around the exterior contour of the shelf.

Update cut settings and make first cut pass on exterior contours of cleat brackets
Hover over the edge of one of the cleat brackets and update/confirm the following cut settings:
Depth: ¼” (.25in)Cut type: OutsideOffset: 0Bit size: ¼” (.25in)Spindle speed (off screen): 6
Make the first cut pass around both cleat brackets, plunging and retracting the spindle between cuts.

Update cut settings and make second cut pass on exterior contours of cleat brackets
To cut through the depth of the material, hover over the edge of the cleat bracket cut and update/confirm the following cut settings:
Depth: ½” (.50in)
Make your second cut pass around each cleat bracket, plunging and retracting the spindle between cuts.
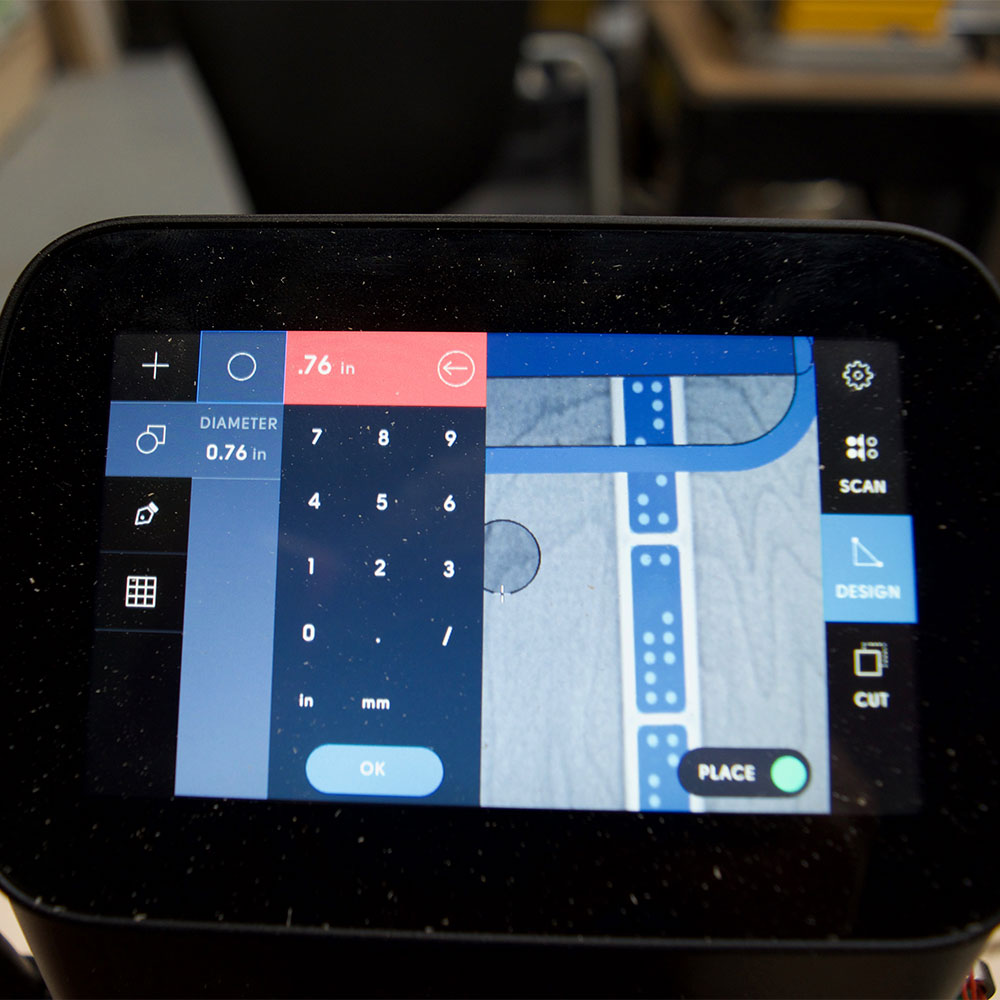
Use on-tool CAD to draw 2 circles
In order to secure the cleat brackets to the cleat, we will cut out 2 circular shims using the on-tool CAD functionality. Find a space available on your work surface that has sufficient view of the remaining ShaperTape. Navigate to Design mode, create 2 circles with a diameter of .76in, and place them in your workspace.

Update cut settings and make first cut pass around circles
Hover over the edge of one of the circles, and update/confirm the following cut settings:
Depth: ¼” (.25in)Cut type: OutsideOffset: 0Bit size: ¼” (.25in) Spindle speed (off screen): 6
Make you first cut pass around both circles, plunging and retracting the spindle between cuts.

Update cut settings and make second cut pass around circles
Hover over the edge of one of the circle cuts, and update/confirm the following cut settings:
Depth: .4in
This depth, just below the full depth of your material, will leave a thin “skin” on the bottom so that the circles will not break loose before your finishing pass.
Make your second cut pass around both circles, plunging and retracting the spindle between cuts.
Update cut settings and make final cut pass around circles
Hover over the edge of one of the circle cuts, and update/confirm the following cut settings:
Depth: ½” (.5in)
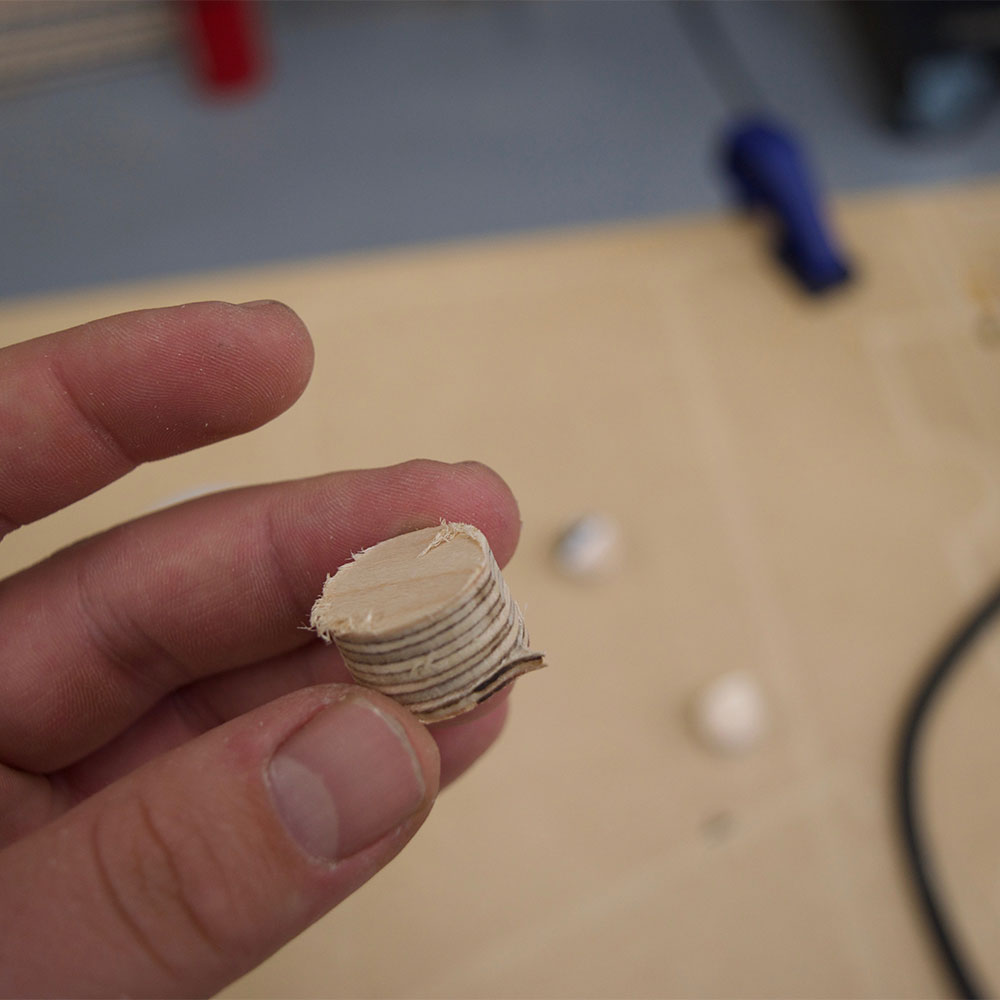
Make your final cut pass around both circles, plunging and retracting the spindle between cuts. Towards the end of this final cut, go very slow. Once you carefully finish the cut, keep the tool very still and retract the bit. This is so the small circle we just cut out does not get caught in the spindle and get kicked around the aggressively.
Sand off the small tail that is left over.
Finishing touches
Pop the designs out from your workstation.
Sand edges with 180 grit to remove any fuzz.
Apply wood glue to the inside of the pocketed joints on each bracket.
Assemble shelf and place two clamps directly over the joints. Clamp and let dry.

Congrats!
You’ve completed the project. Nice work!
Thanks, and happy shaping :)