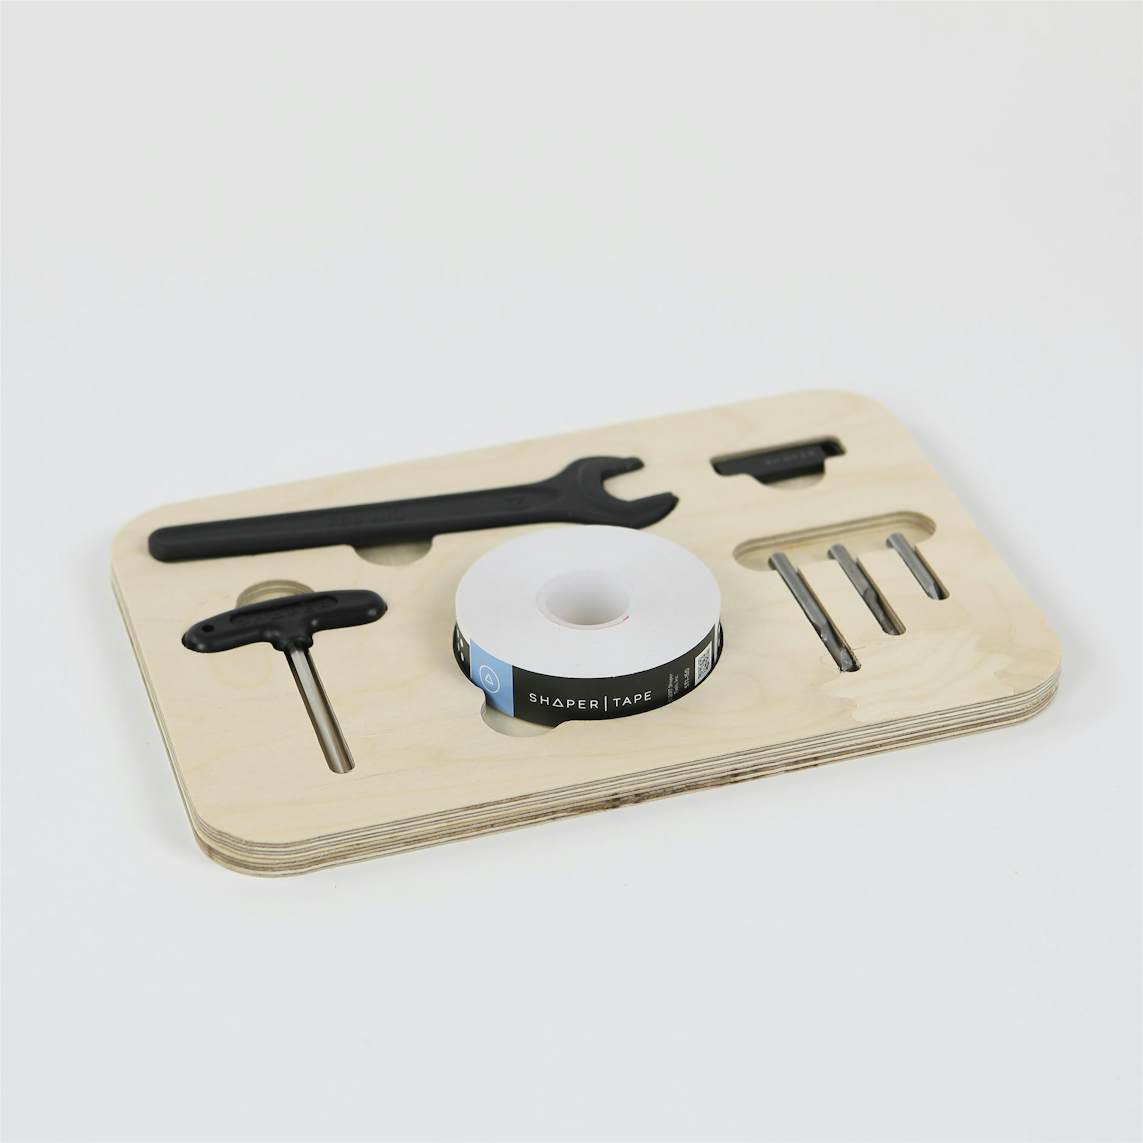
ShaperKit
By Shaper|BY-NC-SA 4.0 License|Created October 13th, 2017


30 min
Easy
214

Prepare your workstation
Place your spoilboard on top of your work surface.
We recommend using MDF. This is used so you can cut through your material without damaging your work table.
Use double-sided tape to affix your 1/4" plywood to your spoilboard. This helps hold down the parts while making cuts.
Clamp the plywood and spoilboard securely to the worksurface. Always clamp materials to a work surface before cutting so that your materials will not move while you are cutting.
For more instruction on how to setup your workstation, click here.

Scan your workspace and place your design
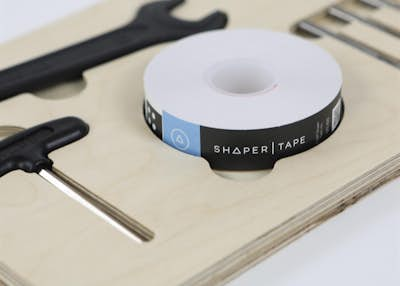
Apply ShaperTape to at least a 30in x 20in area on your work surface.
Scan your work surface and Place the ShaperKit design file in the workspace so that Origin will be able to see ShaperTape at all points.
To test your placement, hover over all paths of your design and ensure you will be able to complete all cuts without running into clamps, edges, or losing the view of the ShaperTape. If needed, you can remove your design and place again.

Install ¼” Up-cut Bit
Unplug and remove the spindle from Origin and install the ¼” Up-Cut Bit. Re-install the spindle into the tool and plug it back in on the left side.
On screen, update the following:
Bit size: 1/4" Up-Cut Bit (.25in)Z touch to calibrate the new bit height to your workspace.
Confirm cut settings and the make first pass of the interior tool shape outline cuts
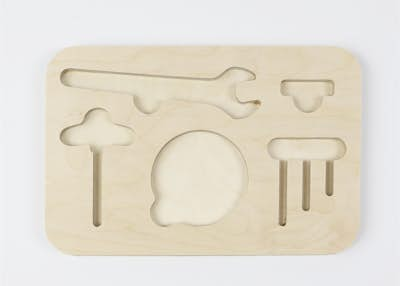
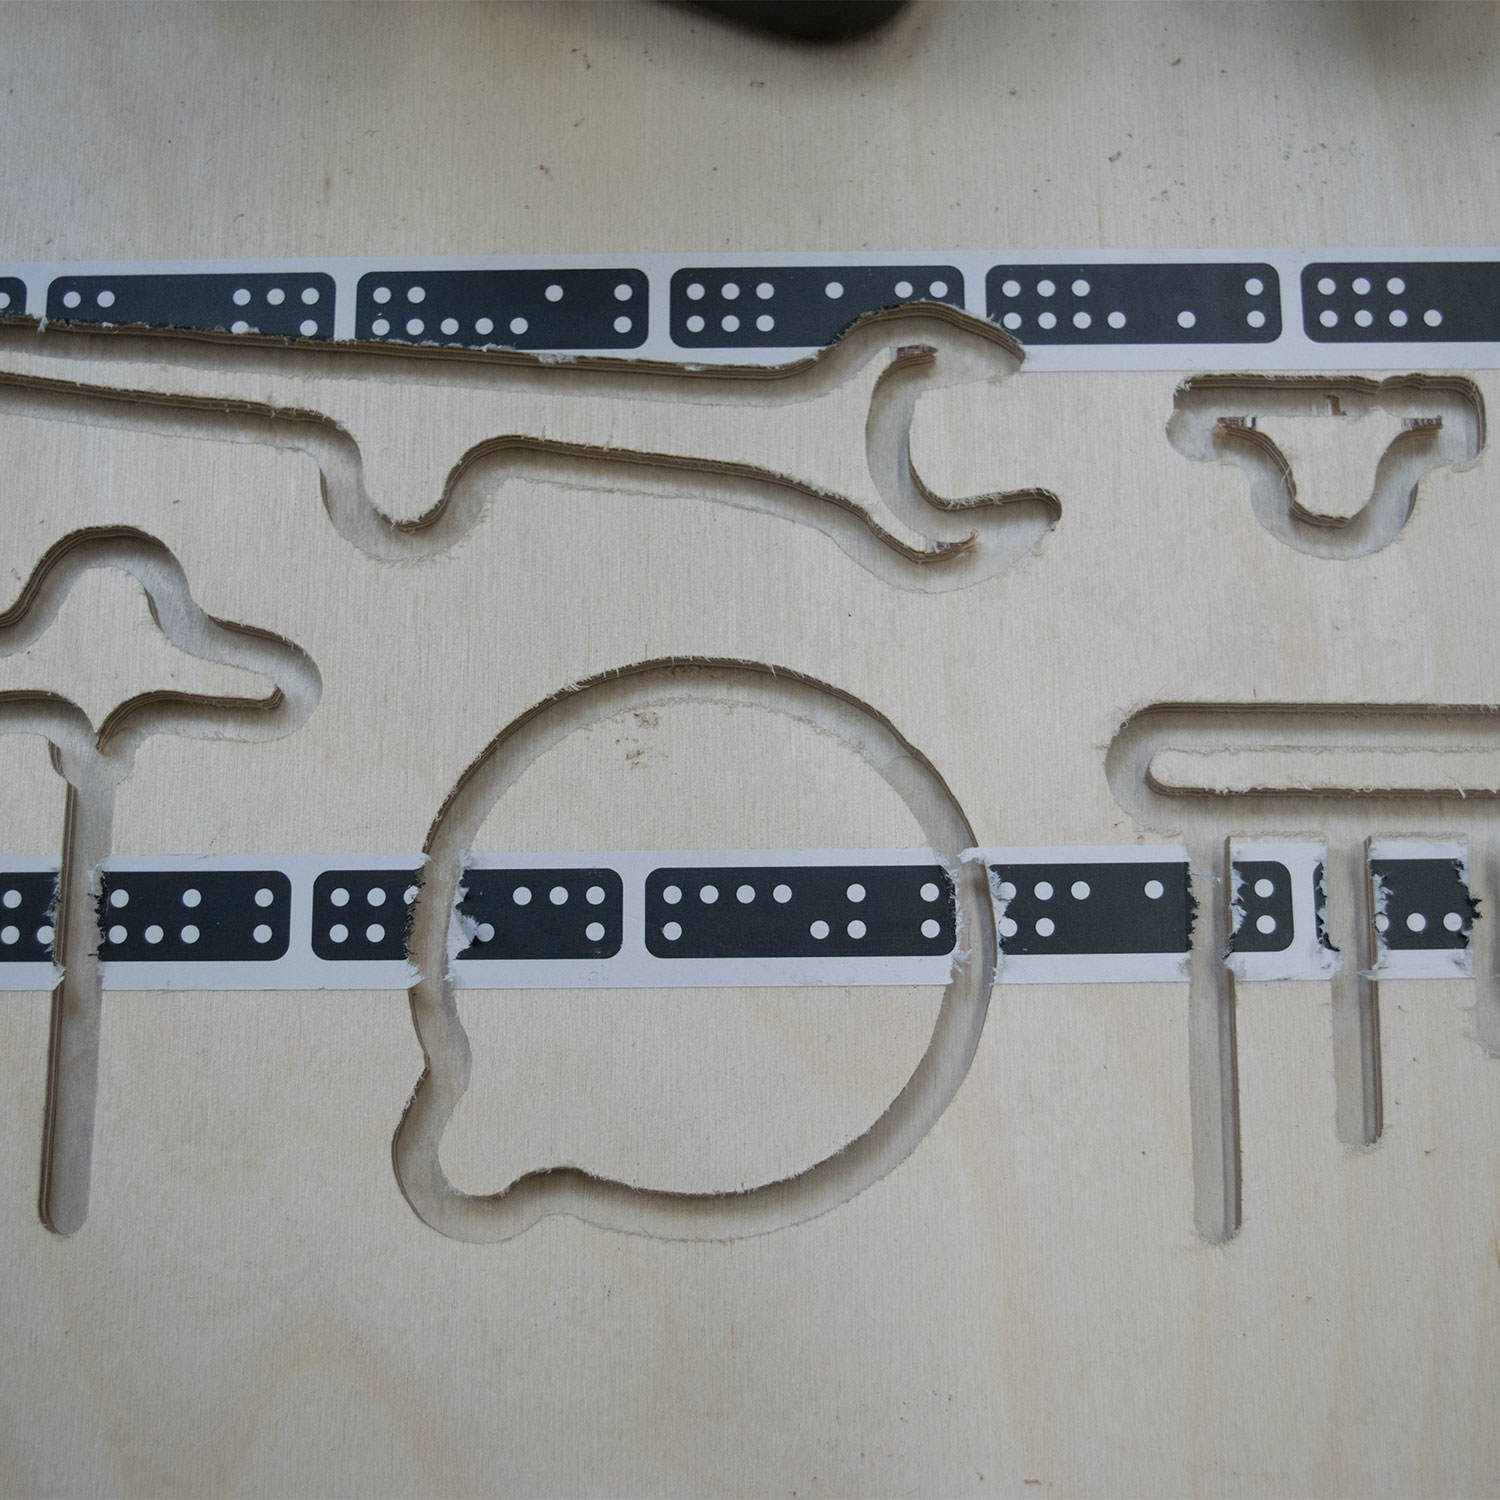
In this design we will be making 2 types of cuts: inside cuts for the tool shape outlines, and outside cuts for the exterior contours.
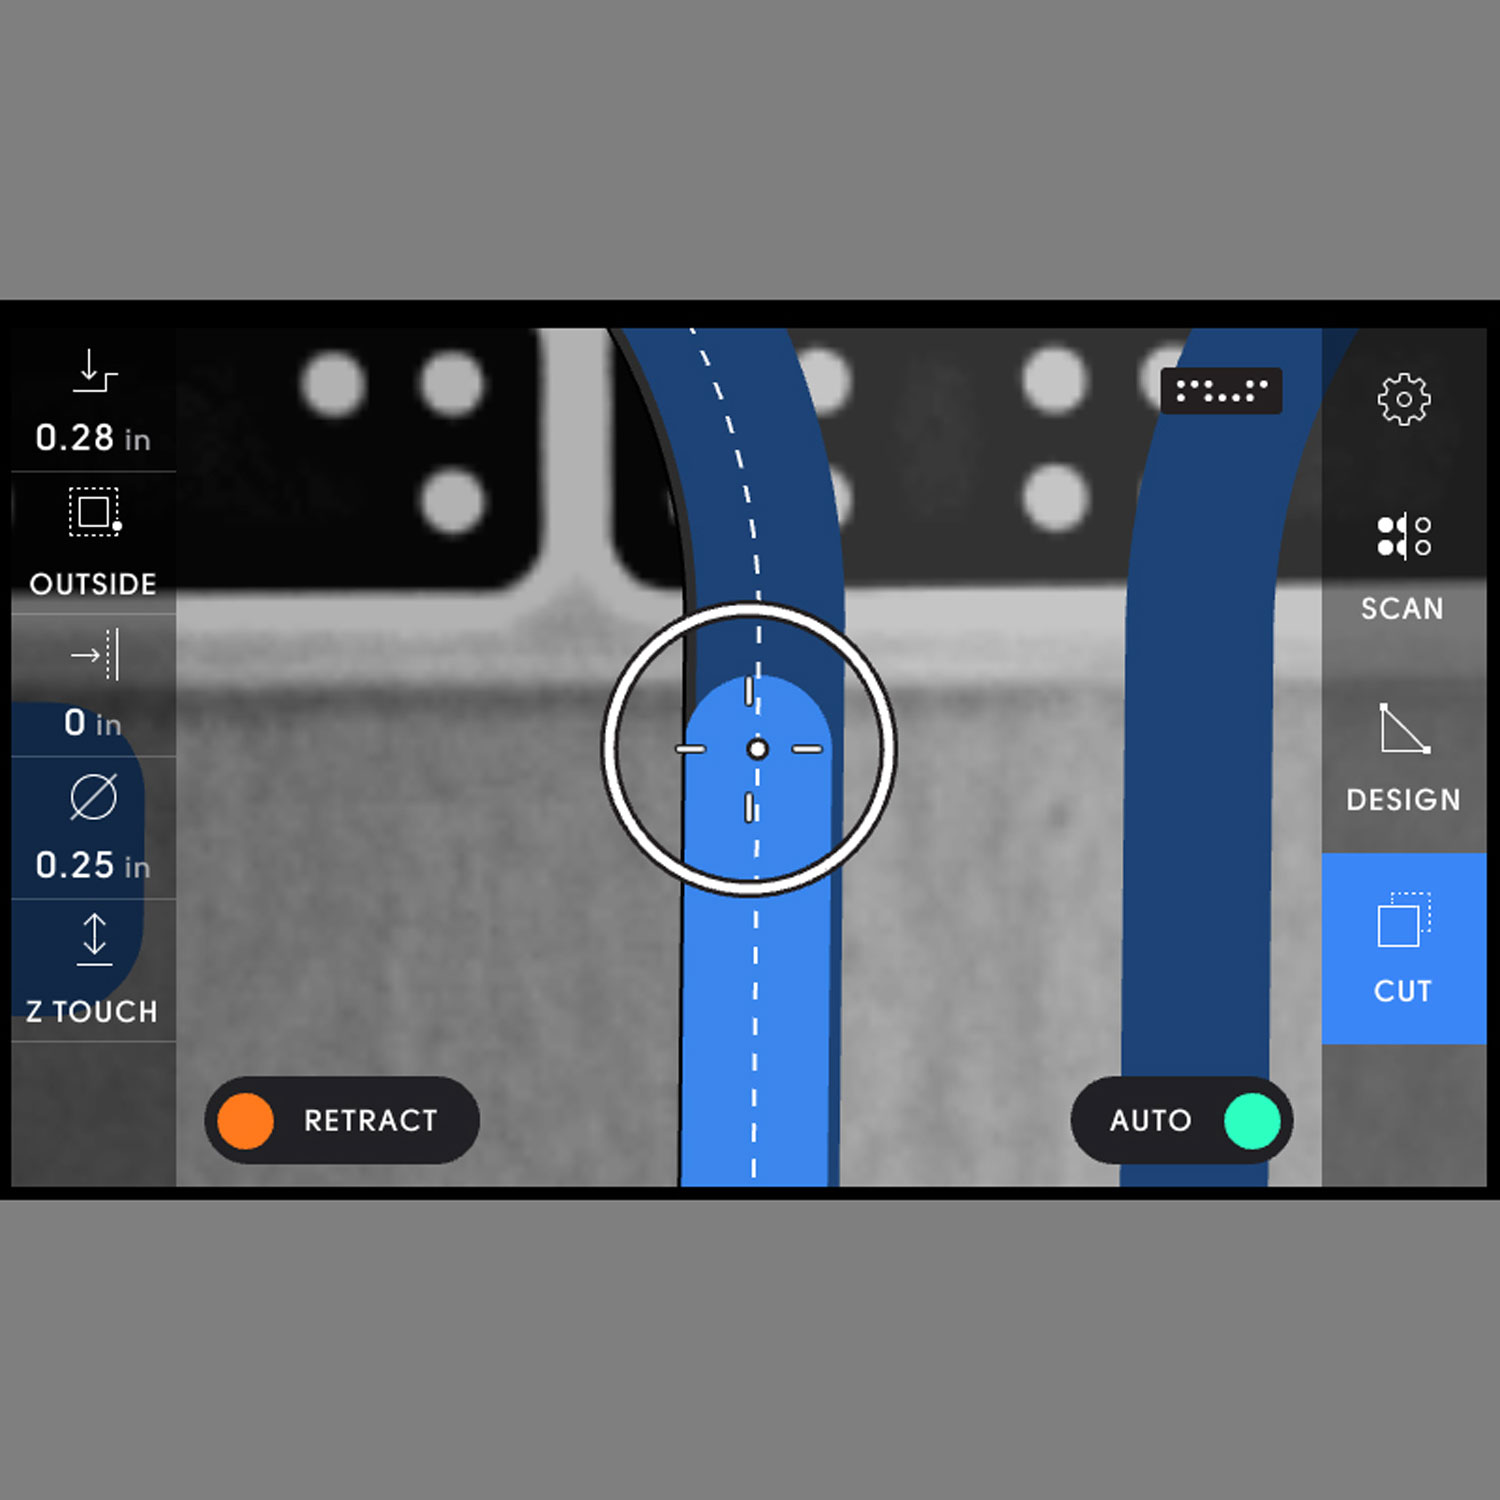
We will start by making all of the inside cuts for the interior tool shape outlines. Hover over the edge of one of the tool shape outlines and enter the following settings:
Depth: ¼” (.25in)Cut type: InsideOffset: .01in*Bit size: ¼” (.25in)Spindle speed (off screen): 6
*Note: To get the cleanest cuts, we recommend using a small offset for your first pass, then following with no offset. To learn more about offsets, click here.
Cut out each of the tool shape outlines, plunging and retracting the spindle between each cut.
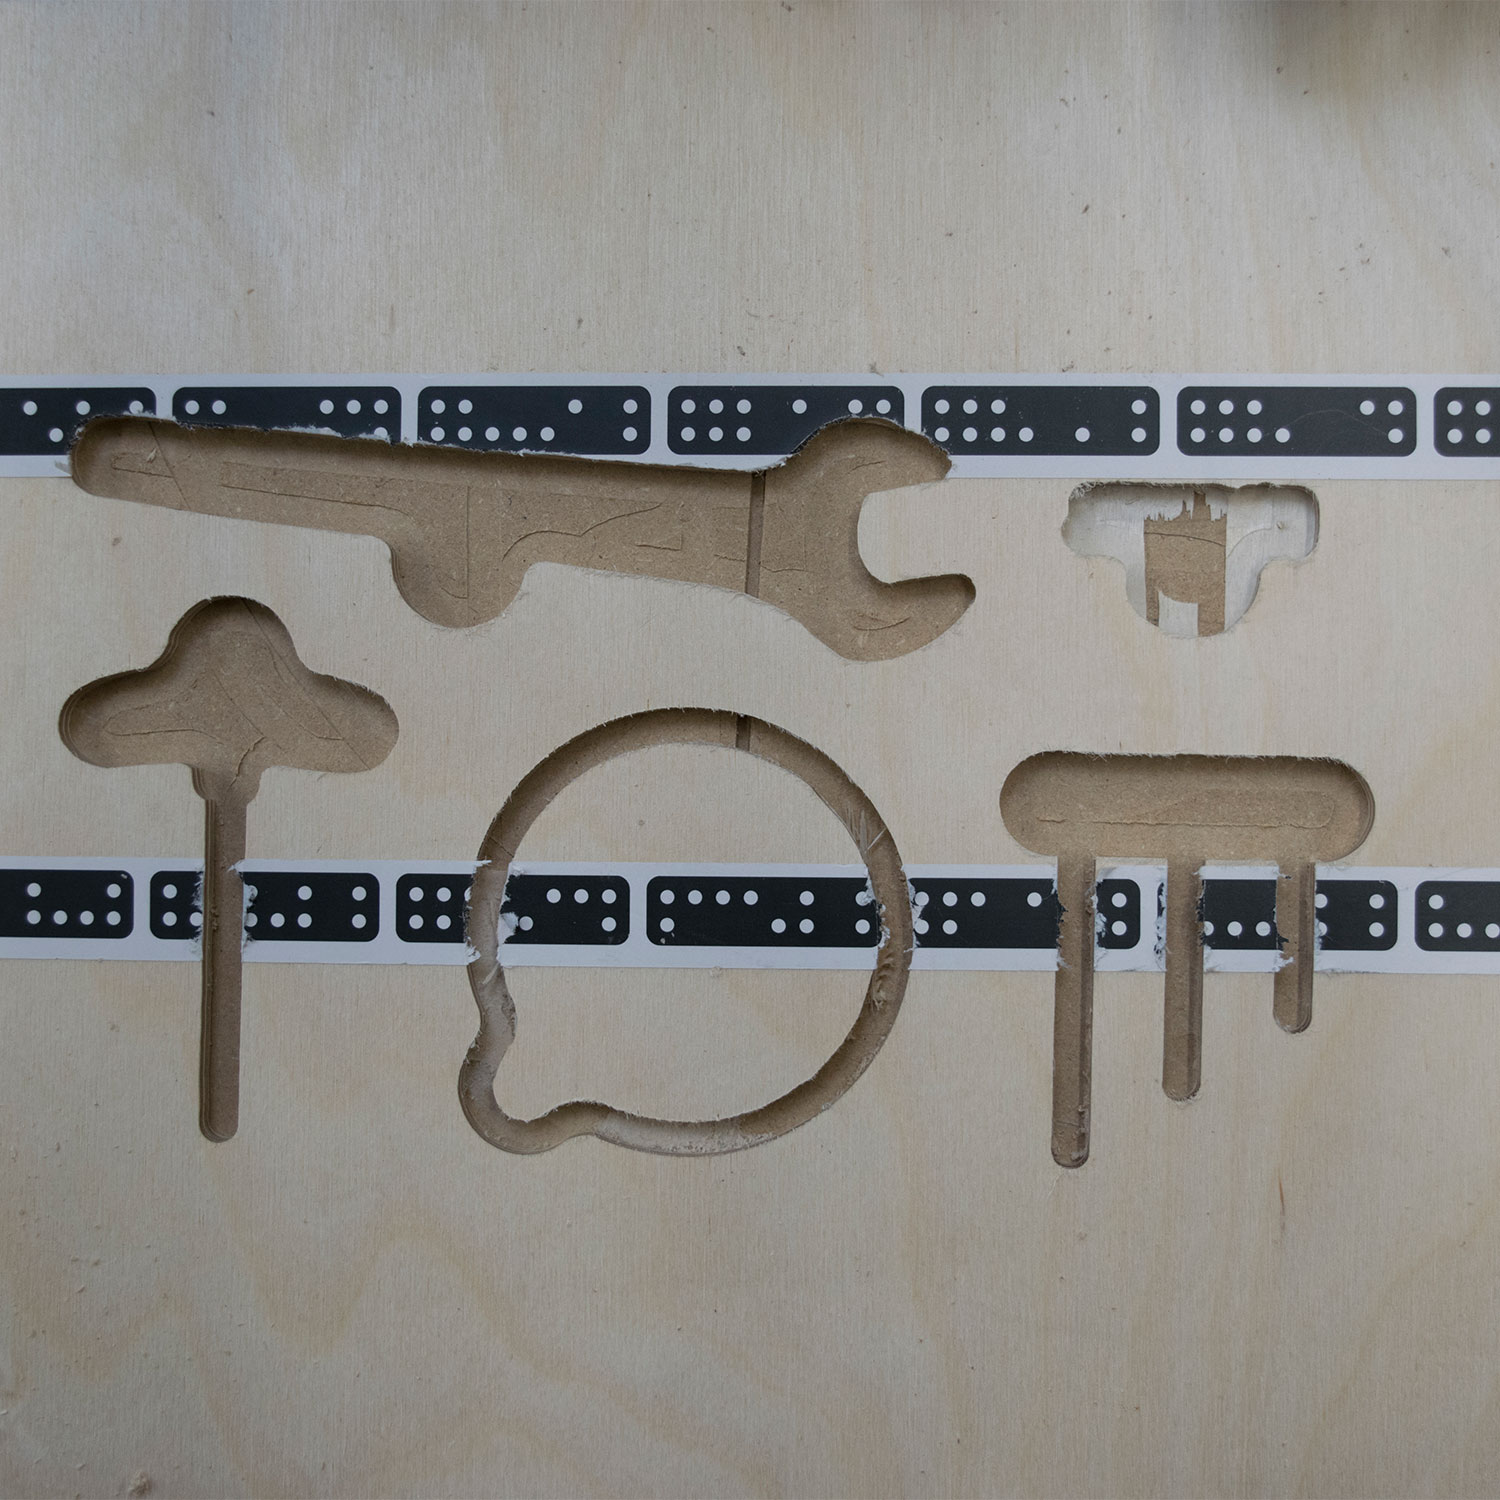
Update cut settings and make a finishing pass around the interior tool shapes
To clean up the edges, we will make a second pass over each of the tool shapes. Hovering over the edge of one of the tool shape outlines, update the following settings:
Depth: .28inOffset: 0
With these new settings complete a second cut pass over each shape, plunging and retracting the spindle between each cut.
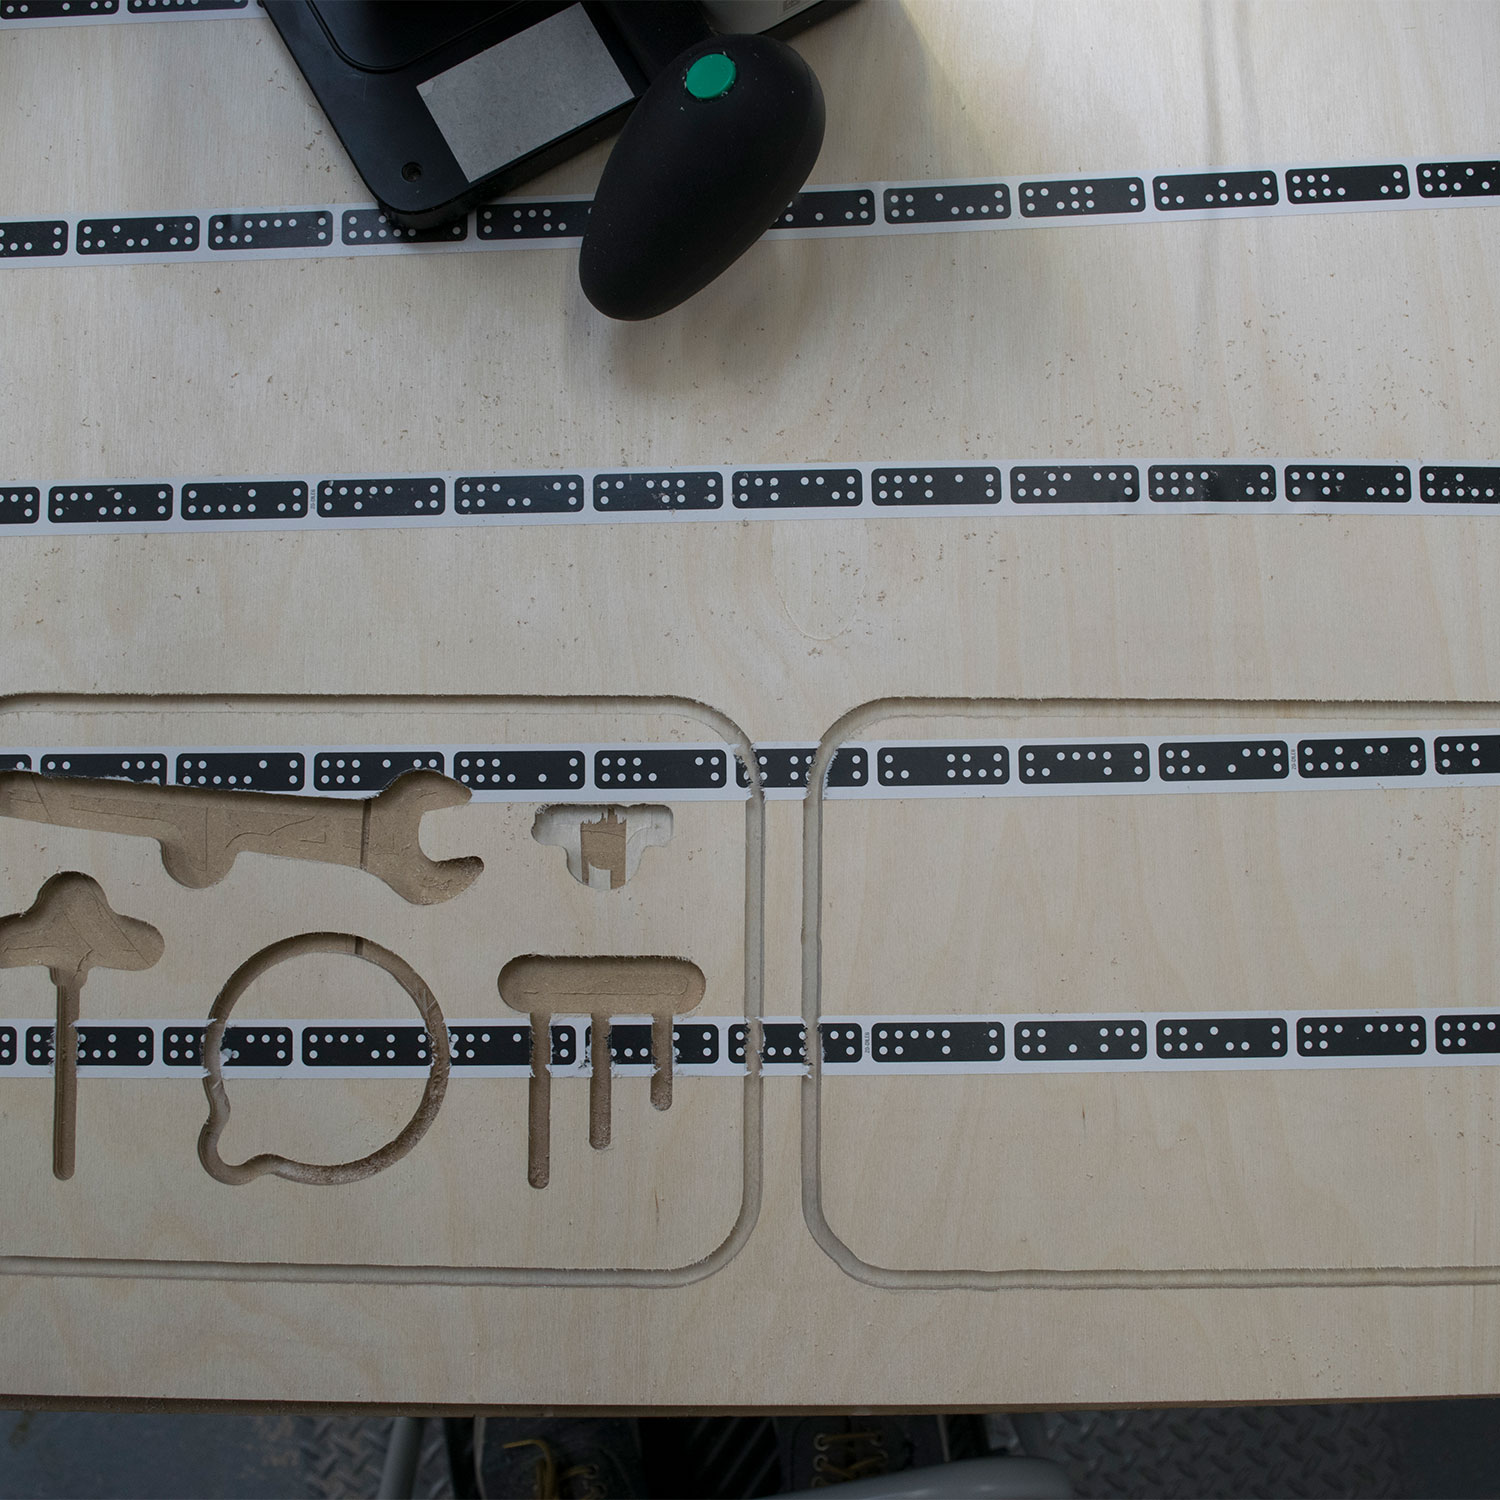
Update the settings and cut out the exteriors
Now it is time to start cutting the exterior contour of the top and bottom pieces.
Hover over the outside edge of the design and confirm the following cut settings for your first pass:
Depth: ¼” (.25in)Cut type: OutsideOffset: .02inBit size: ¼” (.25in)
Cut out the exterior contours of the top and bottom pieces.
Make a finishing cut pass around the exteriors
To clean up the edges, make a second pass over the exterior contours. Hovering over the edge of one of the exterior contours, update the following settings:
Depth: .28inOffset: 0
With these new settings, make a second cut pass over exterior outlines of the top and bottom pieces.
Finishing touches
Pop the designs out from your workstation.
We recommend prying out the cut with a flat head screwdriver.
Use sandpaper to smooth out any rough edges.
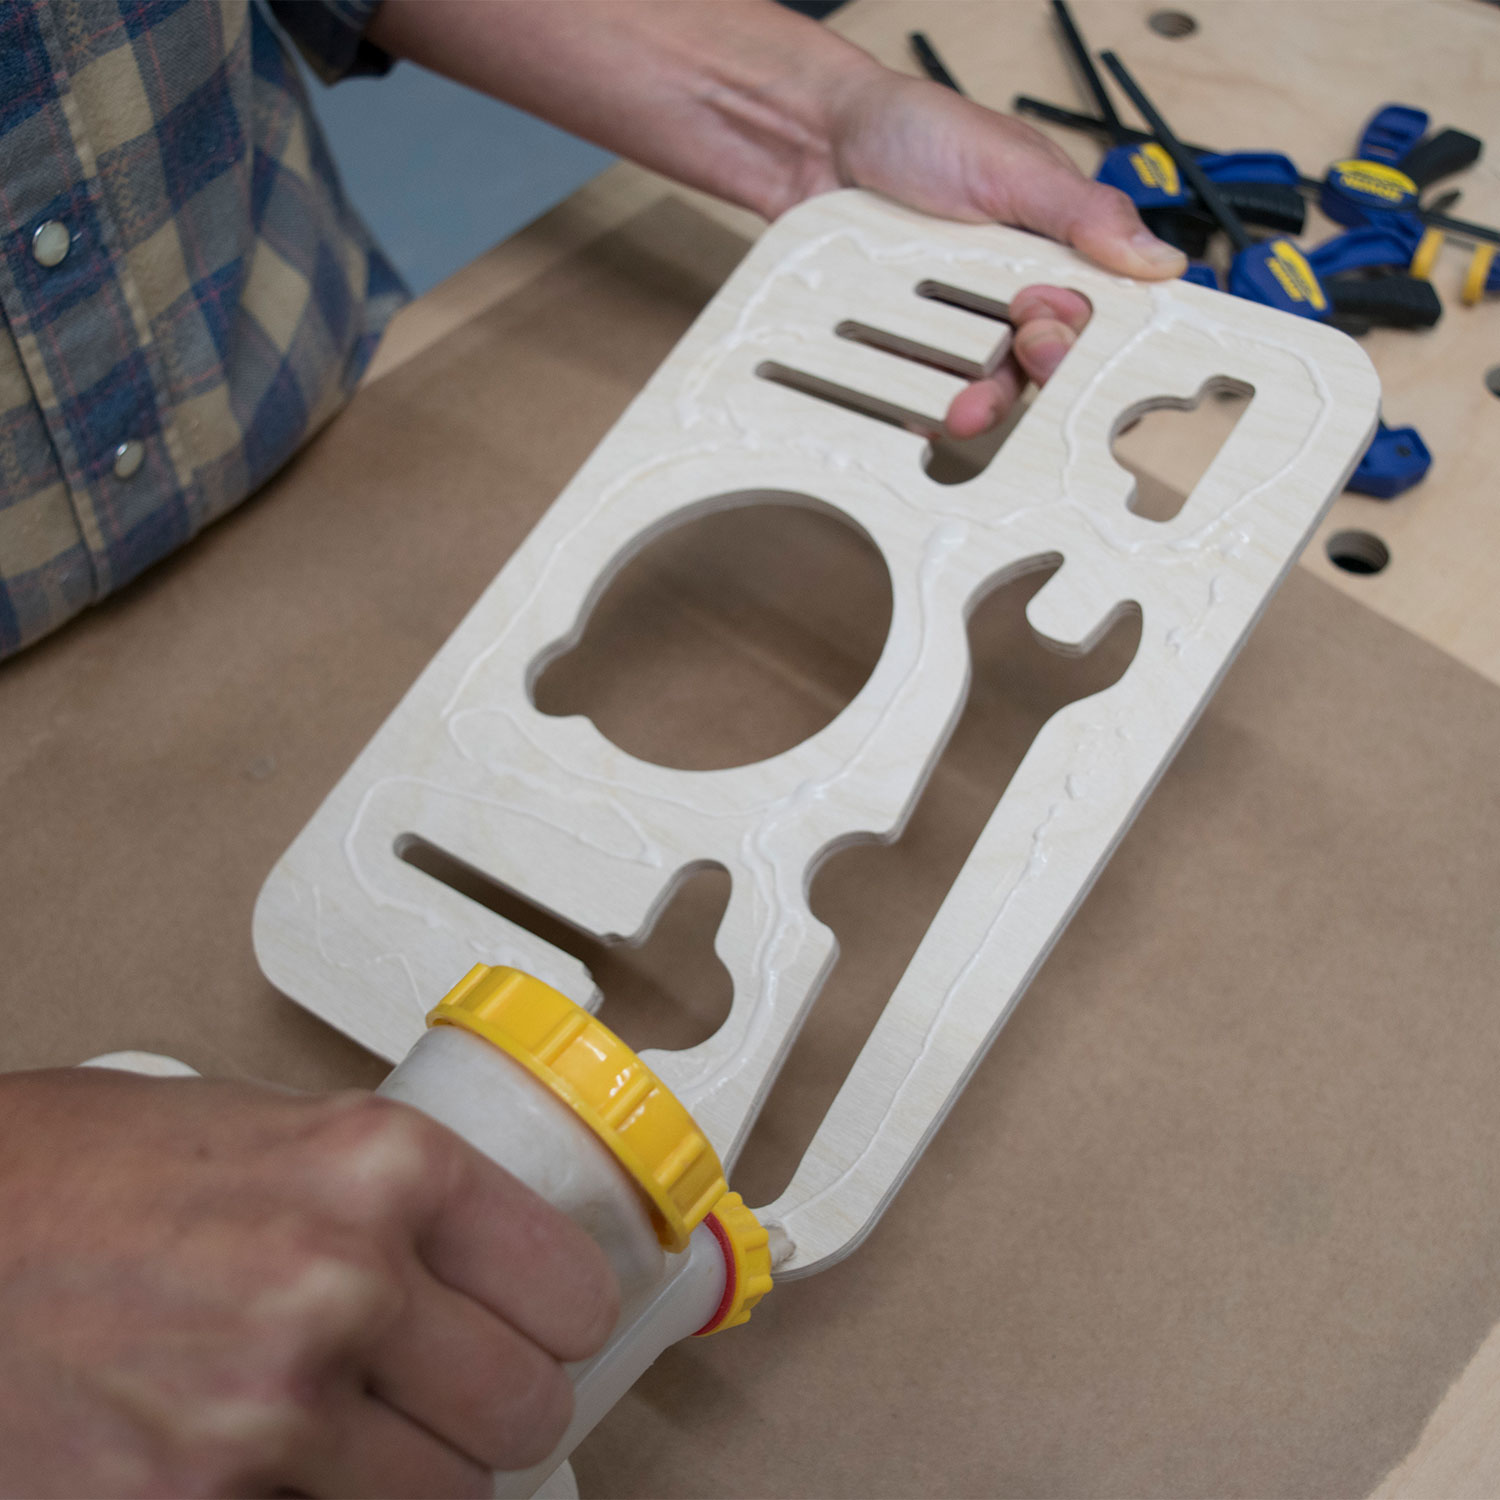
Apply wood glue to the back of the top panel around the tool shape cut outs and place the top panel on top the bottom panel. Once the edges are aligned, clamp your work. Wipe off any remaining glue.
Once dry, you may want to sand again to get rid of any excess glue.

Congrats!
You’ve completed the project. Nice work!
Thanks, and happy Shaping :)