Interlacing Floor Inlay
By Stilwell|BY-NC-SA 4.0 License|Created March 27th, 2019


A classic, angular interlacement with continuous grain direction.
Ready to be inlayed into a wood floor.
17.5" x 12.5"
1 hr 30 min
Intermediate
36
Files included (4)
- 1/8" - 1/4" hardwood (1-2 species)
- Hardwood floors
- Wood glue
- Double Sided Tape
- 1/4" and 1/8" bits
- Shaper Origin
- Planer
- Bandsaw
- Sander
- Calipers
- Flexible metal scraper
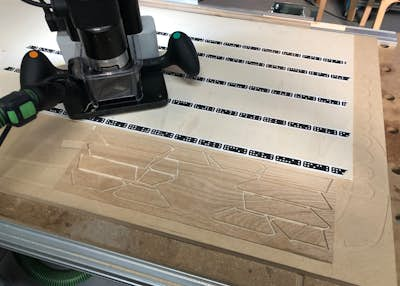
1. Resaw and Plane your material down to the desired thickness (1/8" in my case)
2. Use plenty of double sided tape to hold down your parts as you cut them out to a 0" offset using an 1/8" cutter.
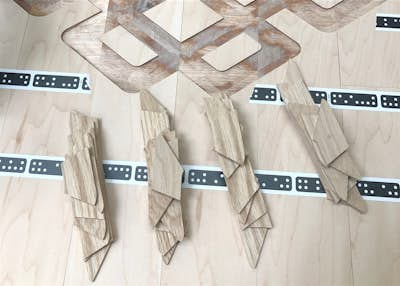
**Note: There are two different sets of pieces for this design; Left & Right and Top & bottom. You'll need two of each. I've included a file that holds both LR and TB called ALL if you want to cut them together like I did in the second photo.
3. carefully pry up your pieces from the tape with a scraper or putty knife.
**Note: It helps to make a pencil mark (X for TB and 0 for LR) on the back of the pieces to remember which face goes down. I suggest keeping them in separate stacks to avoid confusion later on**
4. Place pocket file in your desired location.
5. Using calipers, measure the thickness of your pieces and set cut depth to that measurement.
6. Change to a 1/4" cutter and pocket all areas.
7. Change back to an 1/8" cutter and switch from pocket to inside cuts for all areas. Cut to an offset between 0" and -0.004" in appropriate passes. I found -0.004" worked best for me.
**TEST FIT PIECES AS YOU GO**
8. Spread wood glue evenly inside the pockets and tap in all the pieces.
9. Once dry, sand flush and apply finish.