Bubble Frame
By i3oilermaker|BY-NC-SA 4.0 License|Updated October 10th, 2019
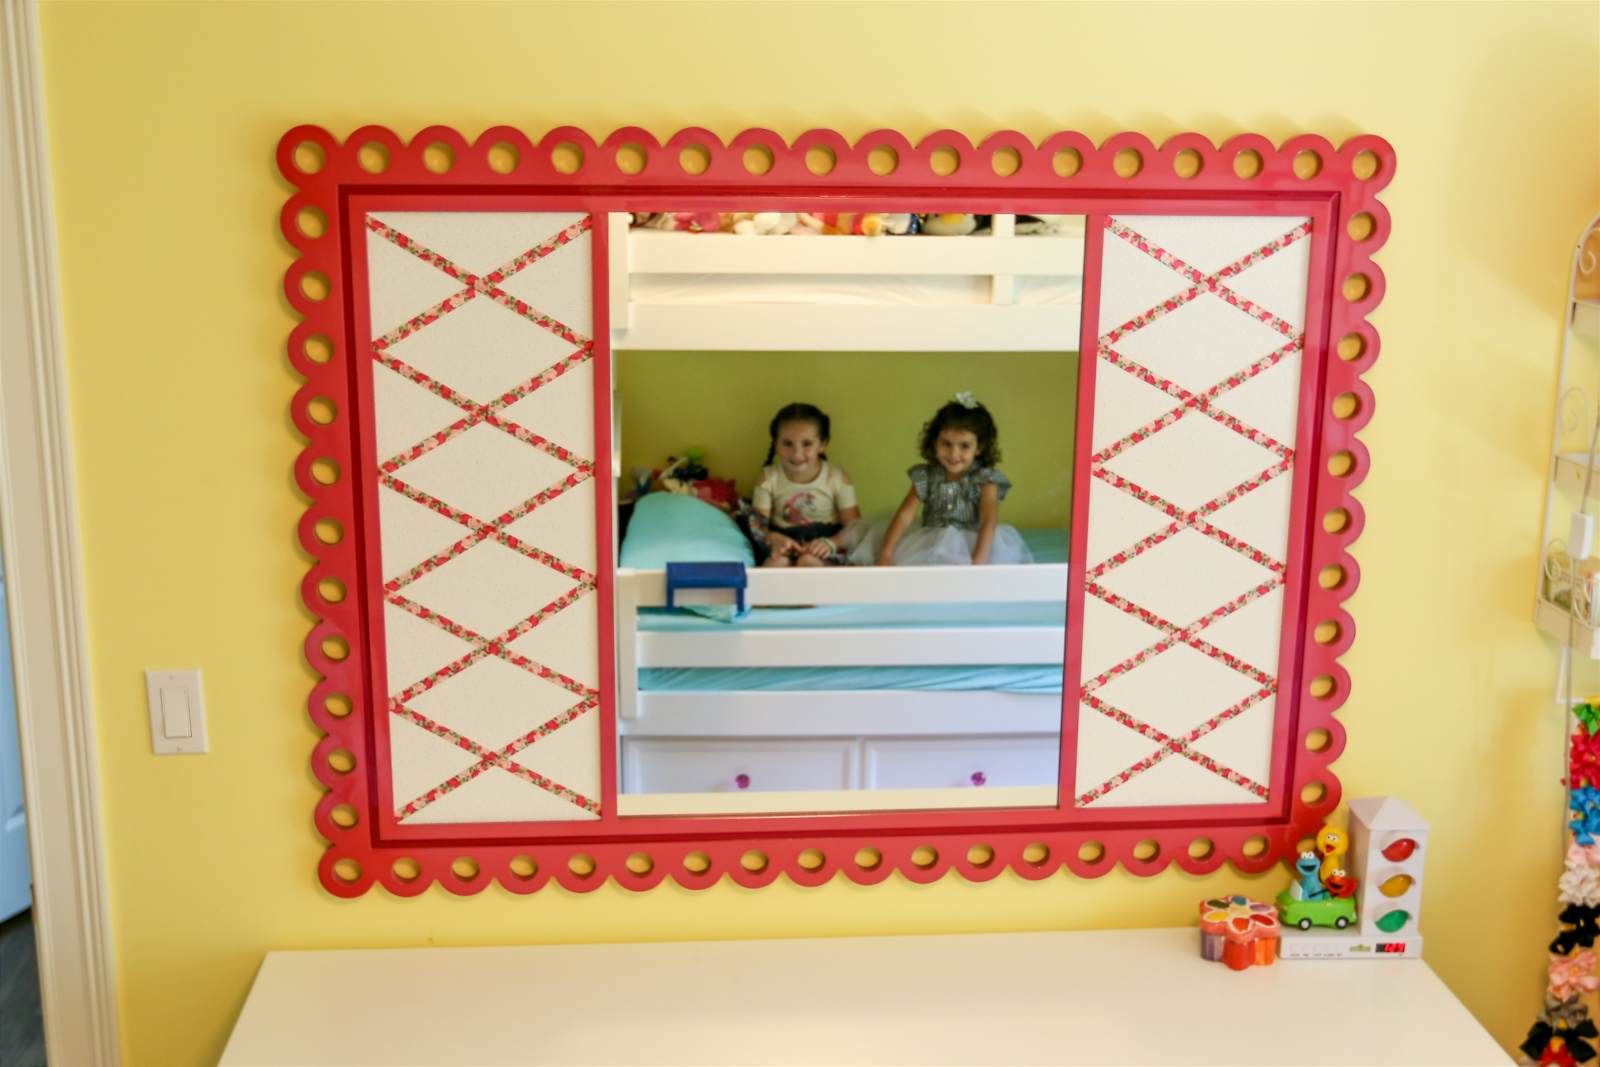

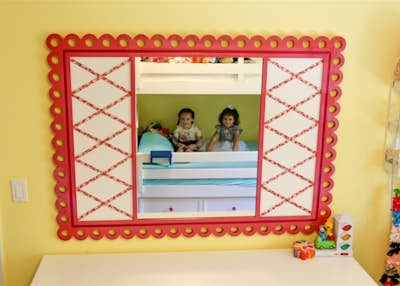


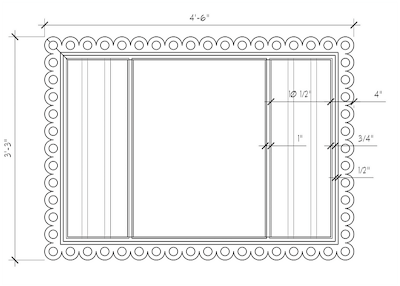
This project is to create a Mirror/Cork Board for a kids room. The final piece is 4'6" x 3'3" but could easily be adapted to different sizes either through scaling the file or manipulating the svg. The Shaper was used to make the frame, but the dividers and backer board were cut on the table saw for speed and accuracy.
2 hr
Intermediate
1
Files included (2)
-- 3/4in Stock (I used 3/4in S4S Maple that was 5" wide)
-- 3/4in MDF or Plywood (for tape board)
-- 1/4in MDF Wasteboard
-- Double sided tape
-- Wood Glue
-- Mirror (Will add spec later)
-- Cork board
-- Hanging Hardware
-- Shaper Origin
-- 1/4in Roughing Bit
-- 1/4in UpCut Bit
-- Table Saw
-- Dowel / Domino Joiner
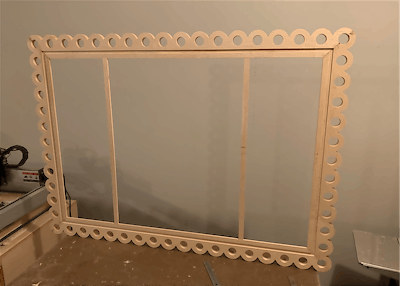
Step 1 - Cut the 4 Frame Sides
This is the most time consuming and detail oriented part of the build. Feel free to approach cutting these parts however you prefer but this is what worked for me. I used a 3/4in tape board and set up my stock on a wasteboard with double sided tape. After a scan, I aligned my image on the stock and placed it (grid would ensure alignment, but I skipped it and had no issues). First I chose to pocket out the full holes instead of doing an inside cut and leaving a plug that could come lose. Then I did 3 passes around the outside perimeter with an offset of .02in. I did one final roughing pass over the top of the outside with .005 offset as I learned the inside "corners" between the bubbles can be a problem area finishing at full depth. I switched to a spiral cutter and did a finishing pass with 0 offset.
Step 2 - Cleanup and Add Dado (Optional)
I find that long straight lines with the Shaper come out mostly straight but with minor imperfections so I did a light pass on the jointer for each frame part on the inside edge. The design calls for a decorative dado and this is accomplished on the table saw. If you have a dado stack this would be ideal, I do not so I made several passes with a flat kerf blade to create the dado.
Step 3 - Cut the divider parts
This is a basic step to cut the divider parts to 1" wide, and slightly longer than 28". Dry fit the frame and sneak up on the final length based on actual dimensions.
Step 4 - Cut the Rabits
Each inside edge of the frame and both sides of the divider need a rabbit on the back side to accept the frame and corkboard. Cut the rabbits to the correct depth and width to accept the materials you have for the mirror and cork board.
Step 5 - Assemble Frame
I used a simple dowel jig to to create a dowel joint at each of the 4 miters and the dividers. Apply glue, assemble, and clamp to try. Be sure to check for square and it may be a good idea to dry fit your mirror at this point. Once the glue is dry this would be a good time to spend a boatload of time sanding.
Step 6 - Paint (Optional)
It kills me to cover up beautiful hardwood, but my kids (and wife) want a Pink frame so I am applying all the paint and finish to the frame at this point.
Step 7 - Install Mirror and Cork board
Cut cork board to fit the rabbit on the back. Install the Mirror and Frame with an adhesive of your choice
Step 8 Install backer board
I used a sheet of 1/8in hardboard to seal in the Mirror and Frame. If they are not flush with the frame shim with foam or cardboard. I used a point driver to secure the mirror along with some hot glue. Screw and/or glue backer board to back of frame, but do not cover holes on the frame
Step 9 Install hanging hardware (used an aluminum french cleat) and hang. Congrats you completed the build! Hope you Enjoy!